Still Being Migrated
Overview
This page covers all possible ways to achieve general and specific modeling and sculpting tasks. There’s no reason to only stick to Blender, ZBrush or any other 3D software, thanks to tools like GoB / GoZ one can send entire or selected parts of the model between both software with one click.
Currently, only Blender, ZBrush and a bit of Maya is covered here, but other software like Fusion 360 and Marvelous Designer is also worth considering for the modeling and sculpting stage. (I’ll most likely add them into this page at some point, when I get more familiar with them).
I assume that you are familiar with the basics of polygon modeling, if not, watch some videos on that.
Even though a lot is possible in both Blender and ZBrush, you should still be using ZBrush for the bulk of the work, because it’s faster and allows for more creativity. But it really depends on what kind of model one is working on.
- My workflow between ZBrush and Blender can be found here
- And here are the Blender and ZBrush hotkeys I regularly use
I’ll use
- 🟠 to indicate that it’s a Blender action
- ⚪ to indicate that it’s a ZBrush action
- 🔵 to indicate that it’s a Maya action
- Blocks like
soto indicate a hotkey or option location
─────────
General Actions
─────────
Adding & Editing Primitive Shapes
| Method | Notes |
|---|---|
| Insert Brushes | ⚪ A quick way to add shapes and even entire models directly onto a SubTool. Works great with mesh fusion and snaps to mesh. |
| Add Primitive Shape | ⚪ Tool > SubTool > Append or Insert🟠 Ctrl + A🔵 Poly Modeling Shelf 🔵 Create > Polygon Primitives |
| Edit Primitive Shape | 🔵 T⚪ ToDo |
🔵 Adding & Editing Primitives
- Interactive Creation can be toggled in the
Create > Polygon Primitivesmenu.

- In the
Create > Polygon Primitivesmenu, one can also directly edit the primitive settings.

Transformations
| Method | Notes |
|---|---|
| G/S/R | 🟠 The fastest |
| Transpose Gizmo | ⚪ If the Gizmo is acting strangely it may be because of focal shift. |
| Transpose Line | ⚪ Advanced Transpose Tool |
| Snap to Ground (macro) | ⚪ Macro > Macros > Snap to Ground |
| Unify | ⚪ Resets location and sets scale as close as possible to 2 units cubed. |
| S.Pivot / C.Pivot | ⚪ Use S.Pivot button to reset the model’s rotation, symmetry, etc. based on the visible polygons. Press C.Pivot to return to how the model was originally. Great for doing Symmetry actions on SubTools that aren’t at the center. |
⚪ Transpose Line Video on Transpose line here.
Click the Gizmo button, to switch between the Transpose Line and Gizmo. (Transform > Gizmo Button)
- Click hold to stick to surface
- Outer circles to position transpose
- Inner circles to modify object (shift works)
Ctrl+LMBon white circle, to make view align to line
Deformations
| Method | Notes |
|---|---|
| Transpose Gizmo Cog Wheel | ⚪ Amazing suite of deformations and transformations. |
| Bend & other Deform Modifiers | 🟠 ToDo |
Remeshing
| Method | Notes |
|---|---|
| ZRemesher/ Quad Remesher Add-on | ⚪ ZRemesher is the best auto retopology tool. 🟠 Quad Remesher is a Blender add-on made by ZRemesher developer. |
| DynaMesh/ Remesh | ⚪ DynaMesh is great for early stages of sculpting. 🟠 Blender’s Remesh takes very long and yields not the best of results. Both of these remeshers are best for the block out and silhouette finding stages. They also both only work when the mesh has no holes. |
| Sculptris Pro/ Dyntopo | ⚪+🟠 Can be useful for block out stages, I don’t however recommend them for beginners because they develope bad sculpting habits. |
| Retopology by Hand | 🟠+⚪ Very good in Blender, but also quite good in ZBrush with the retopology Brush. There’s also a great software dedicated to retopology by hand called Topo Gun |
| Decimate Modifier | 🟠 Reduces mesh density while trying not to lose the mesh shape. |
Edge Control (Bevels, Creases & Edge Loops)
Edge control can be achieved through adding:
- Bevels & Chamfers
- Creases
- Edge Loops
Beveling & Chamfering by Hand
Manually beveling gives the best control of the bevel shape and location, but needs good topology as a base.
| Method | Notes |
|---|---|
| Blender’s Bevel | 🟠 Edges and verticies can be beveled differently. The segment amount, bevel profile as well as other aspects of Blender’s bevels are also very customizable. ( Ctrl + B for Edge BevelCtrl + Shift + B for vertex bevelMMB Scroll for segment amountOther bevel option are in the bevel pop-up menu) 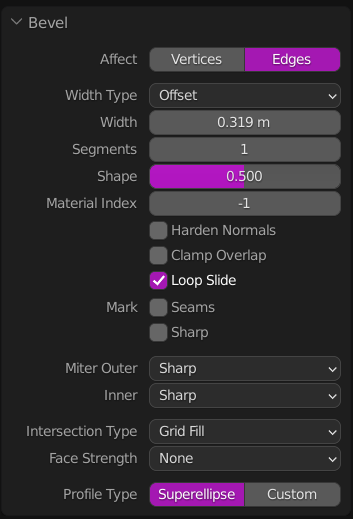 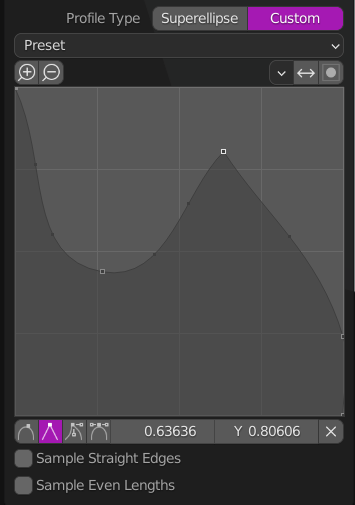 |
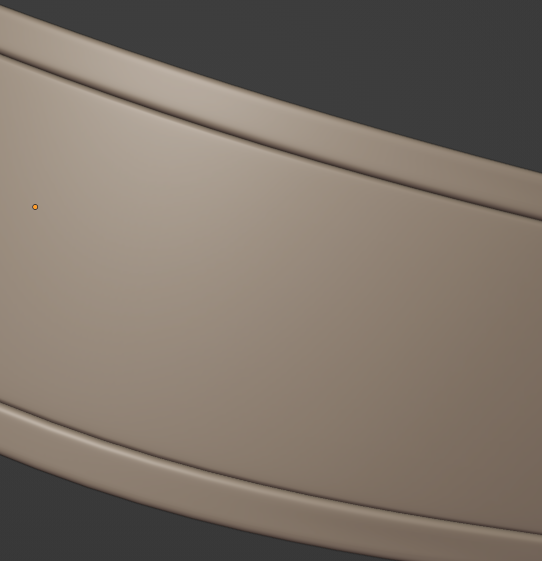
| ZModeler Edge Bevel | ⚪ Manual bevels in ZBrush are done via the ZModeler Brush. Bevel(Edge Mode) can only do chamfers, with 7 profiles to chose from. It’s only capable of making chamfers because it’s not meant to be used like a conventional bevel, but together with subdivisions.Some tips for beveling with the ZModeler Brush:
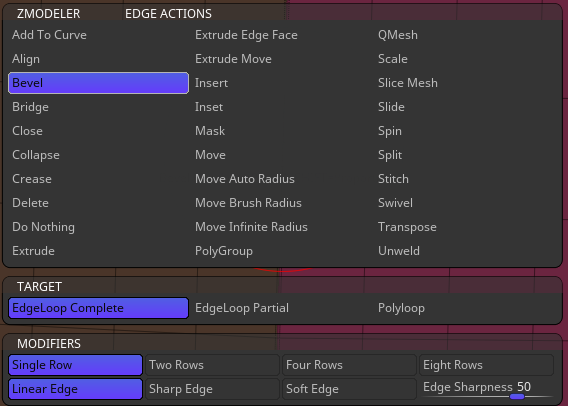 |
| Crease Menu Bevel | ⚪ Similar to the “ZModeler Edge Bevel”, just that this places the bevel based on the creases. Remember to remove the crease. (Tool > Geometry > Crease) |
| Bevel & Chamfer Brush | ⚪ Great for quick bevels on models with bad topology. |
| Hard Brushes like hPolish & TrimDynamic | ⚪+🟠 A sculpting approach to bevels, which makes the bevels look more organic and interesting. (I find this to be a very interesting work ethic to give ones models that extra spice, I’ll be revisitng this in other parts of the handbook) |
Beveling & Chamfering Dynamically & Automatically
| Method | Notes |
|---|---|
| Bevel Modifier | 🟠 Same as the manual bevel, just that edges for beveling are chosen by angle, vertex groups and so on. |
| Bevel Pro | ⚪ Works on terrible topology.
ZPlugin > BevelPro Full tutorial on Bevel Pro) |
| Dynamic SubDiv Menu | ⚪ This menu allows for all kinds of bevels and chamfers. (Tool > Geometry > Dynamic SubDiv) |
Creasing
Creases can be transfered between ZBrush and Blender. Note that creases in Blender can go from 0% - 100%, but edges in ZBrush can only be creased or not.
| Method | Notes |
|---|---|
| Creasing By Hand | ⚪ ZModeler Edge Crease 🟠 Quite good in Blender, because it has the best edge selection tools. ( Shift + E) |
| Crease by Polygroups / ??? | ⚪ ToDo |
| Crease With Selection Menu | 🟠 ToDo |
Edge Loops ToDo
Mirroring
| Method | Notes |
|---|---|
| Mirror Modifier | 🟠 Allows for mirroring of mirrors and other complex mirror operations. Can also use empties as mirror points, to determine mirror location and rotation. |
| Mirror | ⚪ Flips the SubTool from one side to the other, depending on the selected mirror axis. It uses the world center as the mirror point. |
| Mirror And Weld | ⚪ Perfectly mirrors the SubTool from the +X to -X axis along the world center. It welds together both halves. |
Custom Mirror Axis in ZBrush
To circumvent the issue of not being able to set ones own mirror axis in ZBrush, use S.Pivot / C.Pivot.
Booleans
ToDo
Duplicating & Repeating
| Method | Notes |
|---|---|
| Repeat Last Brush Stroke | ⚪ Pressing 1 key will repeat the last action. Works for insert brushes as well: Click sticky button above Transpose Gizmo, then drag out new boolean (Ctrl + Drag) and press 1 |
| Duplicate | ⚪ Move object with Transpose Gizmo + Alt.🟠 Shift + D |
| Live Duplicate | 🟠_ToDo_ (Alt + D) |
| Arrays | 🟠 ToDo ⚪ ToDo |
Splitting & Merging
Splitting
The words split and separate are used interchangeably.
| Method | Notes |
|---|---|
| Split by Visibility | ⚪ Split Hidden (Tool > SubTool > Split) |
| Split by Masking | ⚪ Split Masked or Unmasked Points (Tool > SubTool > Split) |
| Split by Polygroups | ⚪ Groups Split (Tool > SubTool > Split) |
| Split by Loose Parts | Great for splitting SubTools in many different SubTools. ⚪ Split To Parts ( Tool > SubTool > Split)🟠 Separate By Loose Parts ( P or Mesh > Separate) |
| Split by Material | 🟠 Separate By Material (P or Mesh > Separate) |
| Split by Selection | 🟠 Separate Selection, creates a new object (P or Mesh > Separate).🟠 Split Selection, only splits the selected not creating a new object ( Alt + M or Y (already used my Mesh Machine add-on) or Mesh > Split) |
Merging
The words merge and join are used interchangeably.
| Method | Notes |
|---|---|
| Join Selected | 🟠 Join joins all selected object into the active selected object (Ctrl + J or Object) |
| Merge lower SubTool into Current SubTool | ⚪ Watch out, MergeDown merges the SubTool below the currently selected one in the hierarchy into itself and deletes the other SubTool’s history (Tool > Subtool > Merge) |
| Merge all Visible SubTools | ⚪ Watch out, MergeVisible deletes the history of all but the selected SubTool (Tool > Subtool > Merge) |
Filling
ToDo (Fill, Grid Fill, Bridge Edge Loops, Fix Holes, …)
Cutting
| Software | Method | Notes |
|---|---|---|
| ⚪ | Clip & Trim & Knife & Slice (ZBrush) | All of these tools are located in the selection brush menu. (Ctrl + Shift + Click on Brush Selection)⚪ Knife: Use knife to remove parts of the mesh. ⚪ Trim: If knife doesn’t work, use trim instead. Only do straight cuts with trim, because the topology will otherwise collapse!(No Alt)! ⚪ Clip: If you want to remove a part of the mesh but want to keep the topology intact, use clip. ⚪ Slice: Use slice to add in edge cuts. Remember that all of these actions can be inverted with alt. |
| ⚪ | Cuttings With DynaMesh + Polygroups | Slice mesh to get 2 Polygroups, then DynaMesh with Enable Groups, Blur = 0. If the results aren’t as desired, then first set DynaMesh to a high value and then go back down to a lower value |
| ⚪ | Deleting with Selection | Use Selection Tools and then Del Hidden (Tool > Geometry > Modify Topology) |
| 🟠 | Box/Lasso Trim, Line Project | The trim tools are like ZBrush’s knife tool but create Ngons. The Line Project works like ZBrush’s clip |
| 🟠 | Edge Split | Mark edge as sharp, add edge split + solidify + bevel modifier |
Example of Edge Split or Cutting With DynaMesh + Polygroups
Clip (Blender Line Project)
- Smashes the clipped side into the model
- Keeps topology intact
Trim
- Removes trimmed mesh and closes the hole with the close hole operation
- Creates issues because the close holes operation algorithm is quite simple
Knife (Blender Trim)
- Removes knifed mesh and closes holes with its own algorithm
- A better version of trim
- (Knife currently isn’t stable so always quick save before using it)
- For cutting 45° angles with curve knife in all directions, following degrees are good to remember(45°, 135°, 225°, 315°)
Slice
- Creates a clean edge loop through the mesh (Also creates a new Polygroup)
Morphing
⚪ Morphs
(Morph menu is at Tool > Morph Target)
After a morph is stored with the StoreMT button, new strokes ignore each other. This allows for great use of brushes like chisel, layer and so on.
Without Morph Target:
With Morph Target Stored:
While a morph target is stored, one can use the Morph Brush to bring back parts of the stored morph. Or in other words, erase strokes after storing the morph.
Morphs and Layers have great synergy, as showcased in this video: https://www.youtube.com/watch?v=8oU7ZnTSkHA
Shape Keys & Layers
🟠 Shape Keys
⚪ Layers
Extruding & Thickening
| Software | Method | Notes |
|---|---|---|
| ⚪🟠 | Extrude | ZBrush: ZModeler QMesh / Extrude. Blender: Extrude or extrude menu for more options (Alt + E) |
| ⚪🟠 | Push Along Surface Normals or Shrink/Flatten | Blender: (Alt+ S) Enabling Offset Even in the pop-up window can often yield better results. ZBrush: While using QMesh or Extrude hold Shift |
| ⚪🟠 | Mask + Transpose / Move | |
| ⚪ | Thick Skin | Caps the distance a mesh can go in or out, use this in combination with other tools (Tool > Thick Skin) |
| ⚪ | Extract | (Tool > SubTool > Extract) |
| ⚪ | Mesh Project | A mask brush. Mesh Project video here 1:49 min |
| ⚪ | Topology Brush | |
| ⚪ | Slice + QMesh new Polygroup |
Mesh Project
| Hotkey | Name |
|---|---|
| Ctrl | Add new plating |
| Ctrl + Alt | Remove parts of last plating (don’t move camera) |
| Ctrl + Shift | Add plating to last plating (don’t move camera, only click shift when done with shape) |
| Ctrl + Alt (Bool On) | Cut plating into mesh (as new tool) |
| Ctrl + Shift (Bool On) | Add new plating (as new tool, after making a new plating tool, use only ctrl (with bool still on) to add platings while being able to move camera. Then when done, ZRemesh to merge all plating of SubTool) (!rephrase this gibberish) |
(Mesh balloon works the same)
Reprojecting Detail
From high to low
⚪ >
- Apply SubDiv levels to SubTool
- ZRemesh model
- Duplicate SubTool
- Go to the original SubTool (the one with history) and go back before the ZRemesh
- Hide all other objects except for these 2
- Then select the ZRemeshed duplicate. Add 1 SubDiv level and click ProjectAll. Repeat this step however often
🟠 >
Recreating Subdivision Levels
⚪ >
🟠 >
Recreate ZBrush’s subdivisions in Blender
- Add Multires modifier to low and subdivision levels to it
- Add Shrinkwrap to low, select the high and apply it
Or use the Sculpt Layers
Fusing Meshes
| Software | Method | Notes |
|---|---|---|
| ⚪ | Mesh Fusion | Only works with 2 meshes at once. Mesh Fusion Tutorial. Video of nicely using it here |
| ⚪🟠 | DynaMesh/Remesh | DynaMesh/Remesh will fuse meshes when they are close enough |
⚪ Fusion
- Turn off DynaMesh
- Place mesh with insert brush for example, make sure the back faces are facing the target mesh
- Create a Polygroup around area where fusion should happen
- Clear mask, then clear mask again for fusion
ZModeler
Introduction To ZModeler
ZModeler is a brush in ZBrush that allows for poly modeling. Royal Skies has a great playlist covering everything about the ZModeler as quickly as possible.
- Hover over vertex, edge or face and press space to open the ZModeler action menu
- Alt hold to paint poly group white, whiteout letting go click alt again to cycle through poly groups
ZModeler Actions
Vertex Actions
Edge Actions
Bevel
- Hold on edge to bevel
- Click on another edge to repeat last bevel amount
Insert(Loop Cut)
- Alt to dissolve edge
Face Actions
Q Mesh (Smart Extrude)
- Pull on face to extrude
- Push in face to delete block
- Hold Shift to dissolve closet edge loop
- Hold Alt to duplicate and separate faces
- While extruding click alt to cycle through poly groups
- Extrude does smart merges, smart merge chamfer step amount can be adjusted
Inset
- One can choose to inset entire poly group
- Clicking on other face gives them the last inset amount
- Ctrl and shift for more
Visibility & Masking
ToDo
- Mask Changed Points
- Polygroup Changed Points
─────────
SPECIFIC ACTIONS
─────────
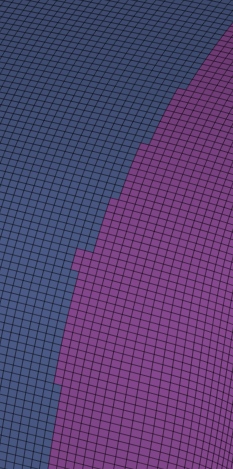
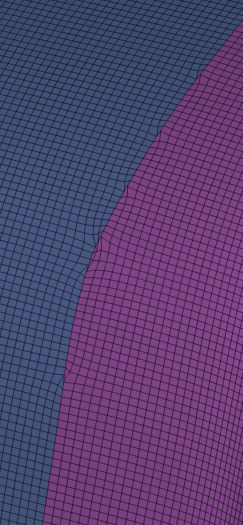
Diamond Grid
Used for fishnet stockings, fences and nets.
🟠 >
Square grid to Diamond grid (quad based)
- Un-Subdivide and in the pop-up window, set Iterations to 1
- Poke Faces then Tris to Quads
- Armored Vitaly Poke (best result) (Armored scripts add-on)
⚪ >
Cushion
Example
![[Pasted image 20230608023725.png]]🟠 >
- Armored Colony’s Approach to it
- Or use Cloth Pro add-on
Bevel Transitions
🟠 >
Example
Connecting Circle with Square or Low Detail Circle
🟠 >
Example
![[Pasted image 20230608024158.png]]Rotation Reset Trick
🟠 >
Rotation Reset Trick or “box trick” is a method for removing extra data from a model: unwanted transforms, corrupted internal data, etc.
- Create a cube
- Merge object with issues into cube and delete cube mesh
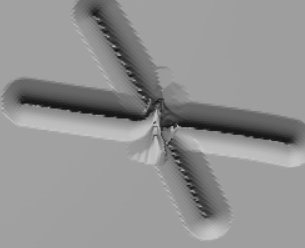
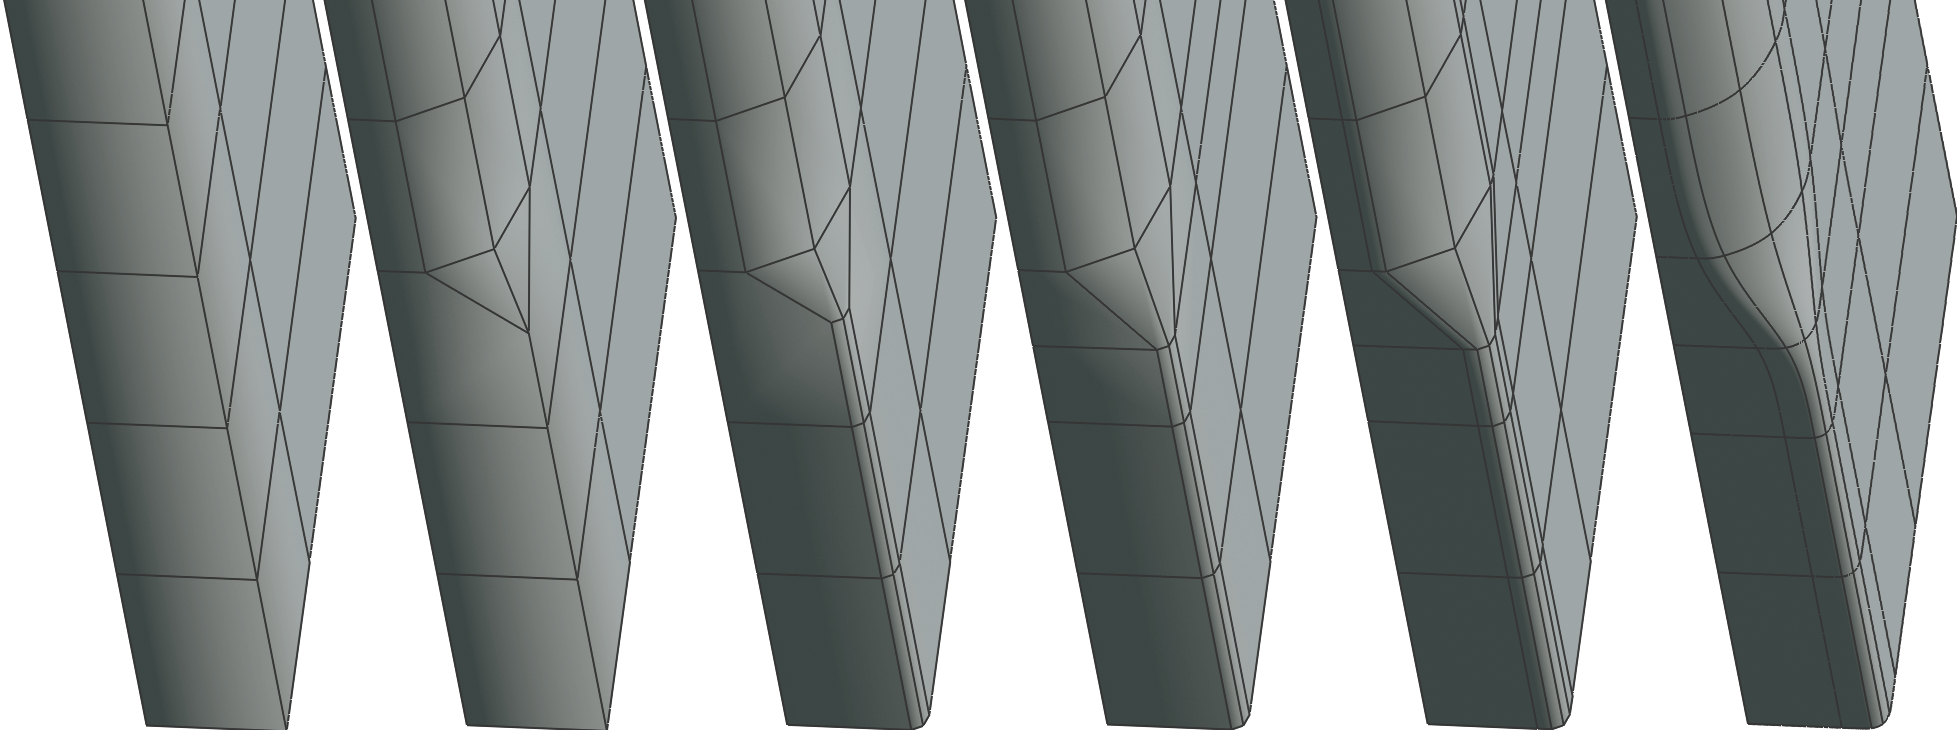
Bend Object along the Surface of Another
Example
![[Pasted image 20230608023737.png]]🟠 >
- Make sure the origin is at the point where the object should connect with the target object
- Extrude outwards at the connection point. And add a 4 segment bevel at the lowest corner
- Make a vertex group and assign every edge loop a different weight. Starting at the outermost loop with a weight of 1. Give the second outermost a weight of 0.8 and so on. After assigning weight 0.2 stop.
- Set cursor to object origin. Add a grid, and turn on wireframe for that object. Then press F9 and adjust the grid topology density. The more curve the target has, the more dense the gird has to be.
- Add a surface deform mod to the object. Target: Grid, Click Bind.
- Apply scale and rotation for grid, object and parent object to grid
- Add Shrinkwrap mod to gird. Snap Mode: Outside surface, Target: Target Object
- Enable face snap. Snap With: Median, Align Rotation to Target. And place the grid on the target surface
- Add DataTransfer mod on Object. Source: Target Object, Vertex Group: vertex group from 3., Face Corner Data: Custom Normals
⚪ >
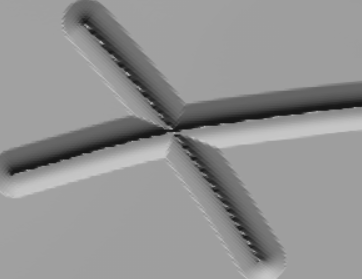
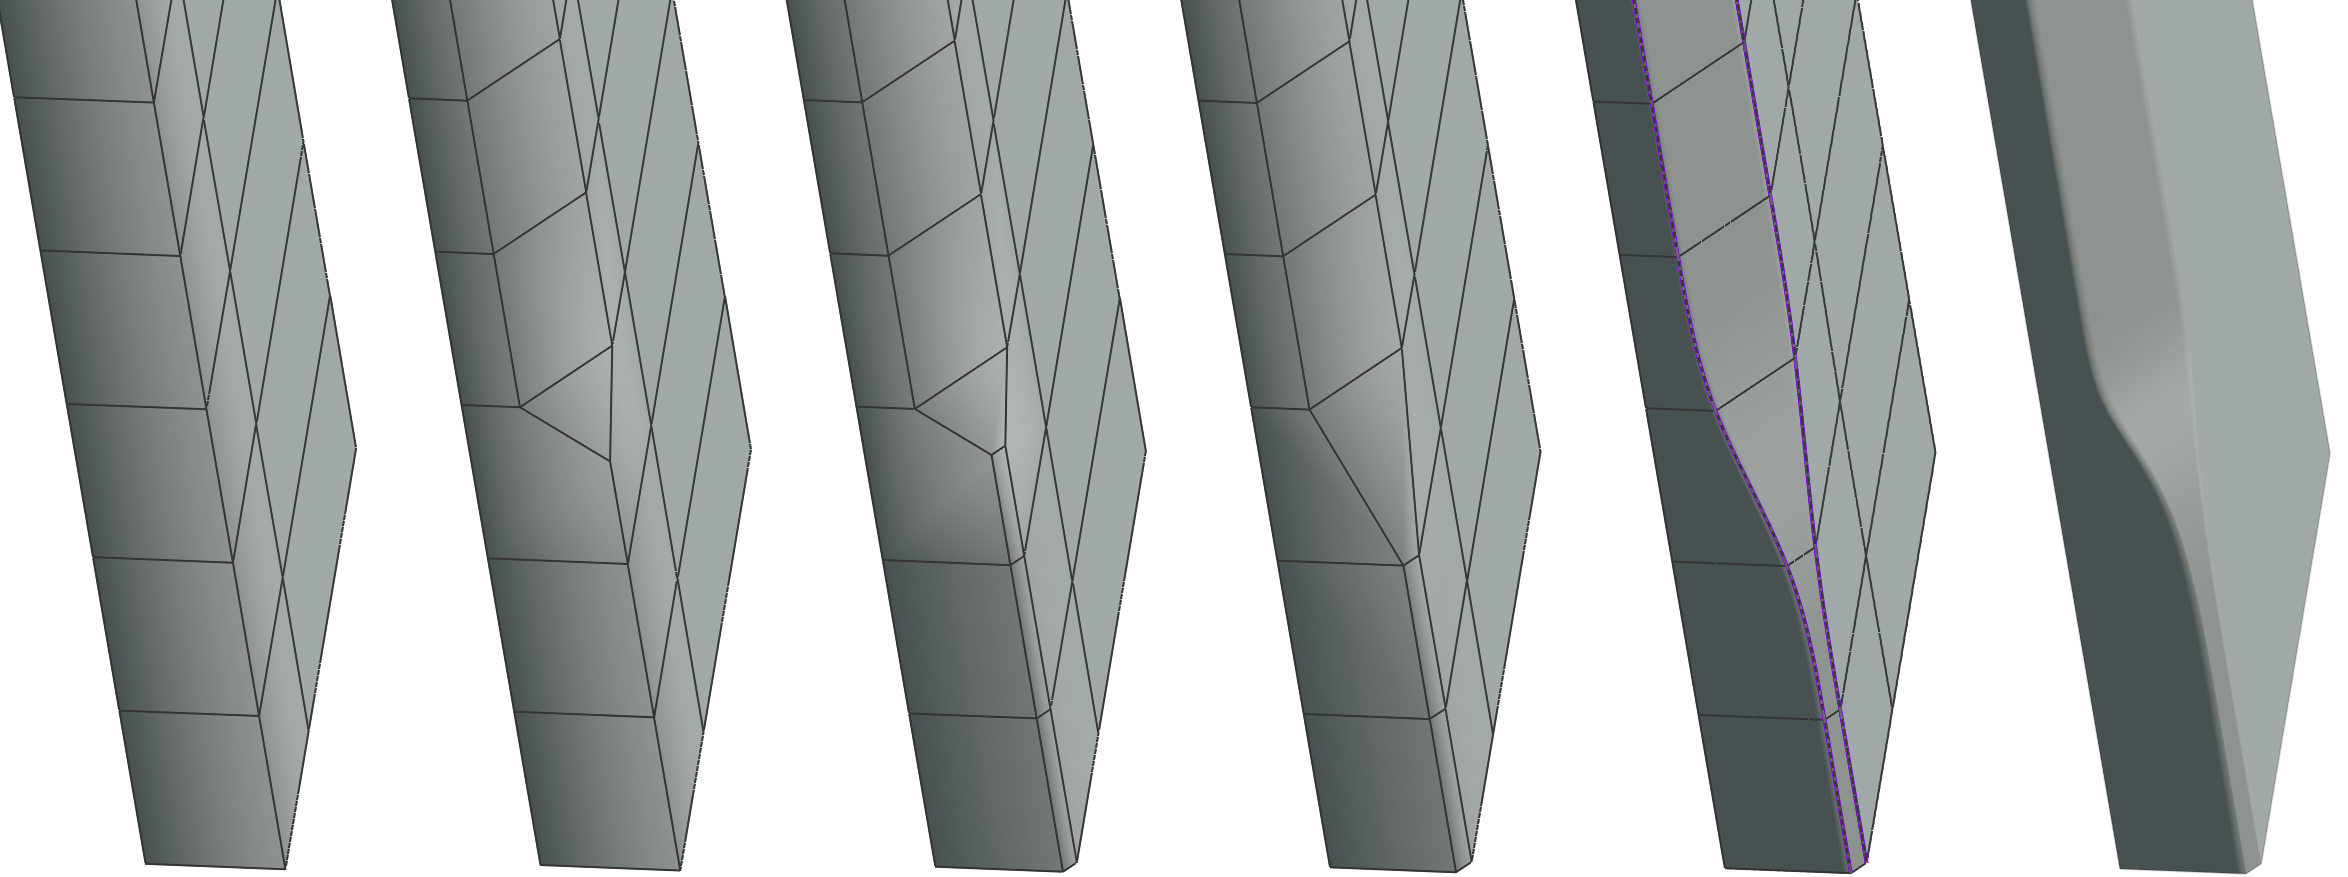
Clean Surface Transition Between 2 Objects
Example
![[Pasted image 20230608023749.png]]🟠 >
Shrink wrap + Vertex groups
- Make sure the origin is at the point where the object should connect with the target object
- Extrude outwards at the connection point. And add a 4 segment bevel at the lowest corner
- Make a vertex group and assign every edge loop a different weight. Starting at the outermost loop with a weight of 1. Give the second outermost a weight of 0.8 and so on. After assigning weight 0.2 stop.
- Add Shrinkwrap mod. Snap mode: Outside surface, Target: Target Object, Vertex Group: vertex group from 4.
- Enable face snap. Snap With: Median, Align Rotation to Target. And place object on the target surface
- Add DataTransfer mod. Source: Target Object, Vertex Group: vertex group from 4., Face Corner Data: Custom Normals
Wireframe
Example
![[Pasted image 20230608023800.png]] ![[Pasted image 20230608023809.png]]| Software | Method | Notes |
|---|---|---|
| 🟠 | Wireframe Modifier | |
| ⚪ |
Clothing, Armor or Retopology
| Software | Method | Notes |
|---|---|---|
| 🟠 | Shrinkwrap + SubDiv | Use Shrinkwrap and SubDiv with others mods like bevel. In the Snap To menu, switch to the Snap With Closet mode. When retopologizing results may often be better on lower SubDiv levels because the Shrinkwrap won’t have the chance to imprint every sculpted imperfection. |
Interesting Skin Clothing Effect
Example
![[Pasted image 20230608023822.png]]| Software | Method | Notes |
|---|---|---|
| 🟠 | Edge Split At Perfect Angle | Edge Split mod set to specific angle amount. Other mods to use with this: Solidify, SubDiv, Bevel, Shrink Wrap |
Smoothing Polygroup Borders
| Software | Method | Notes |
|---|---|---|
| ⚪ | Smooth Groups Brush | (Lightbox > Brush Tab > Smooth Folder > Smooth Groups.ZBP) Be careful to not smooth the mesh by accident, use masking |
─────────
SCULPTING
─────────
Organic sculpting is something best learned by simply sculpting and watching others sculpt
Sculpting Tips
- Try to adjust brush strength as little as possible and instead set up your stylus correctly
- Don’t have the mindset that every sculpt will be a portfolio piece
- Jump around the sculpt instead of finishing one area. This has 2 main reasons. The first being, that one should first get the main shapes correct before moving on to smaller shapes and reasons two is, if one works on one area too long, one stops seeing mistakes
- Regularly check silhouette and proportions by zooming out, moving the head away from the screen and turning on ZBrush’s silhouette preview
How you should Sculpt EVERYTHING (J Hill - 27min)
15 Blender and ZBrush Sculpting Tips No One Talks About (Outgang - 7min)
Brushes
The B ... box is the hotkey for the brush. “B” for “brush” and the other letters for the brush name.
Main Brushes
- Clay Buildup
B CB - Standard
B ST - Dam Standard
B DS
Surface Smoothing
- Smooth
- Trim Dynamic
B TD - hPolish
B HP(Same as flatten but respects hard edges, alt for different behavior) - Flatten
B FA - Planar
B PL
Special Brushes
- Move
B MV(+Interesting interaction with Ctrl) - Inflate
B IN - Layer
B LA - Bevel Arc / Flat
B BA/B BF - Pinch
B PI - Scribe Chisel
B SC - History Recall
B HR
Great Brush Packs
Search for Brushes and Insert Brushes on ArtStation and Gumroad.
- Orb Brush Pack (free)
- Flipped Normals Skin Kit (paid)
- 550 Blender Brushes Stylized Edition (paid)
- Sculpting Brushes for Dragons, Lizards(paid/free demo)
- Igor Golovkov (free + paid)
- Flipped Normal Shop Sin Brushes (free + paid)
Sculpting Videos
For good YouTube channels look here
- Principles of Sculpting | Complete Guide to Zbrush 2022 (1h 26min)
- Top Tips for Improving Your Sculpts in ZBrush (Flipped Normals - 31min)
- ZBrush- General Organic Sculpting Tips (Arrimus 3D - 25min)