Topology resources (videos, articles)
Everything you need to know about topology
Top 5 Topology Mistakes to Avoid
Articles:
Topology Types
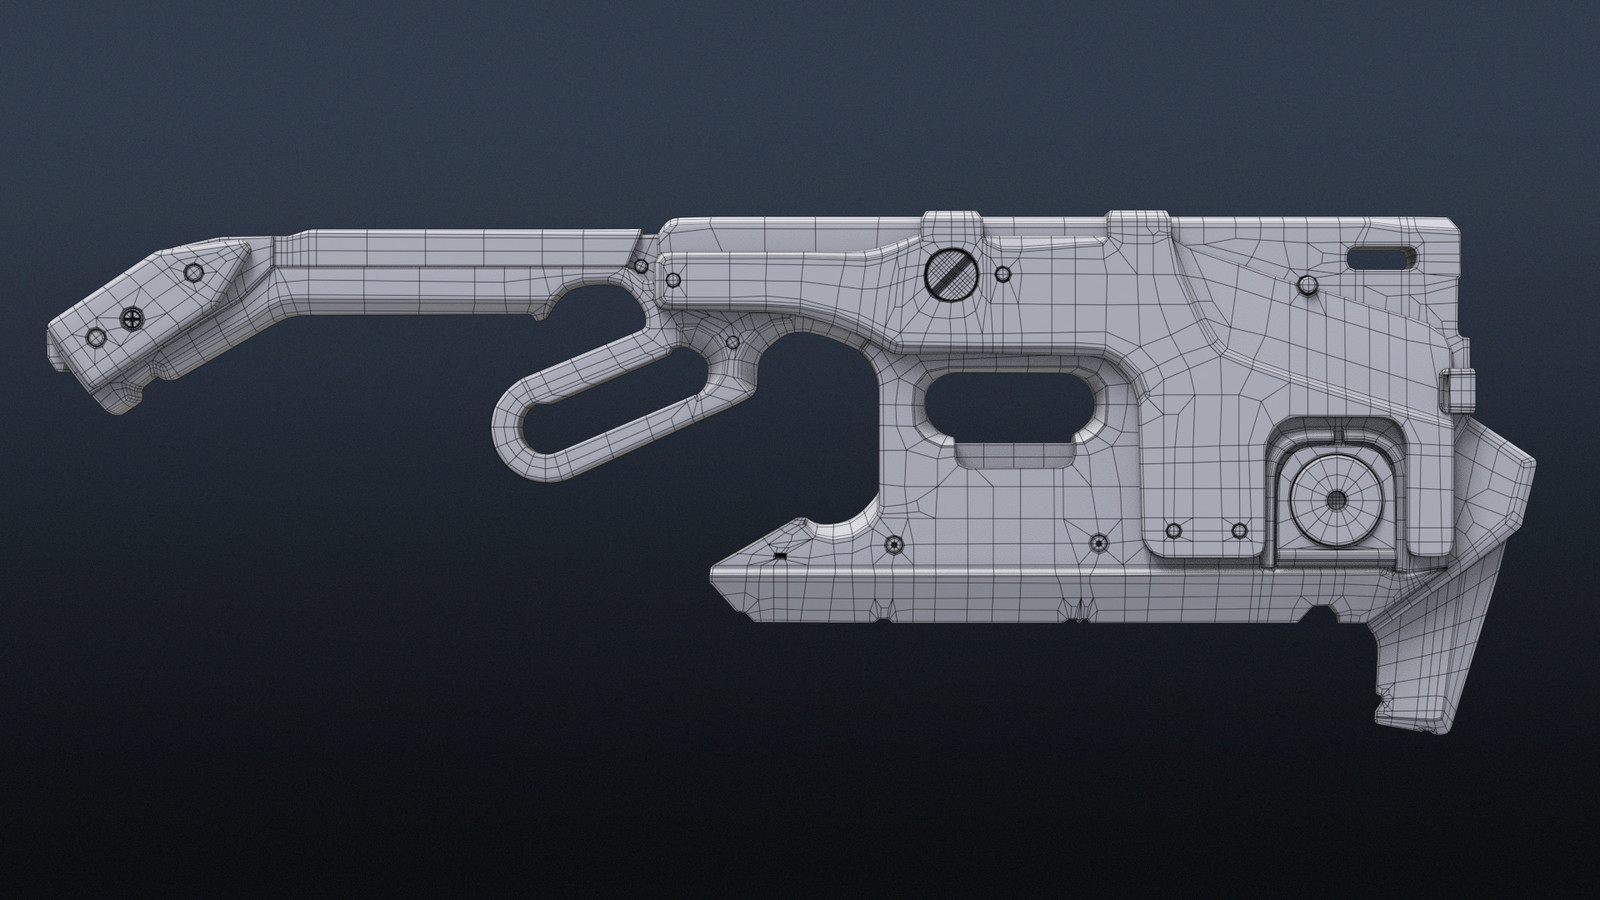
The approach to topology varies significantly based on its intended use case. For example, in the game industry, performance is key while the film industry cares less about that and more so needs high detail for close up shots.
For Real-Time Use (Game Industry)
First, there’s the high-res mesh. This mesh has to play nice with SubDiv, bevels and other modifiers that the mesh needs to utilize. It’s only used for baking and as a base for the retopology of the low res mesh. Then there’s the low res mesh, the low res mesh is the game ready topology and needs to be optimized, and doesn’t have to work with modifiers (SubDiv, bevels).
For Pre-Rendered Content (Film Industry)
The most commonly used workflow in the film industry, is the subdivision workflow, where the topology is done in such a way to nicely work with and be controlled by subdivisions. This can save a lot of time by removing the need for creating a low mesh for baking, because the low and high can share the same mesh but with different subdivision levels. This means, if one requires really close up shots, one can simply bump up the subdivision level and then after the shot set it back down to something more reasonable.
(Because of this, game studios will often create a subdivision friendly mesh in addition to their in-game mesh, so they can better make cinematic videos with them.)
Reusing the high as the low won’t always work. If the model was sculpted and not poly modeled, then one will either have to create a new clean mesh by hand or use tools like ZRemesher. The topology will also have to be redone if the object requires soft body deformation.
Some examples of professional film industry topology:
 topology by Andrew Hodgson
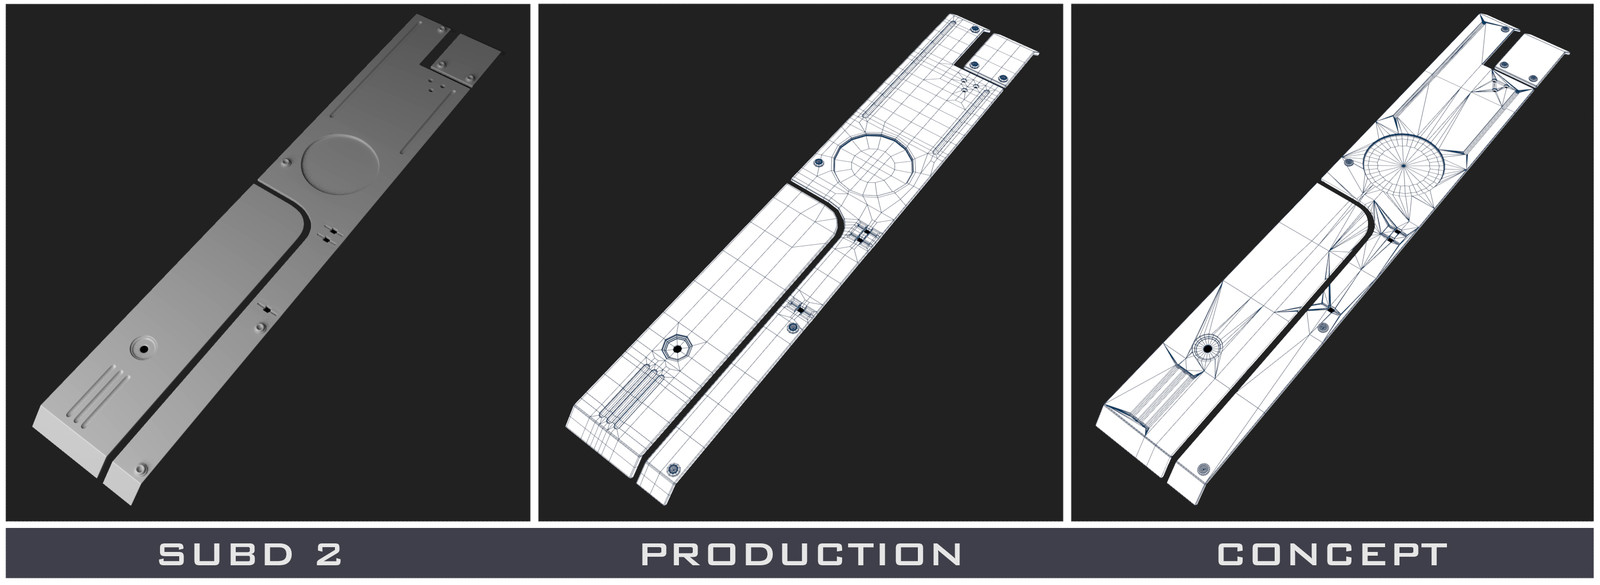
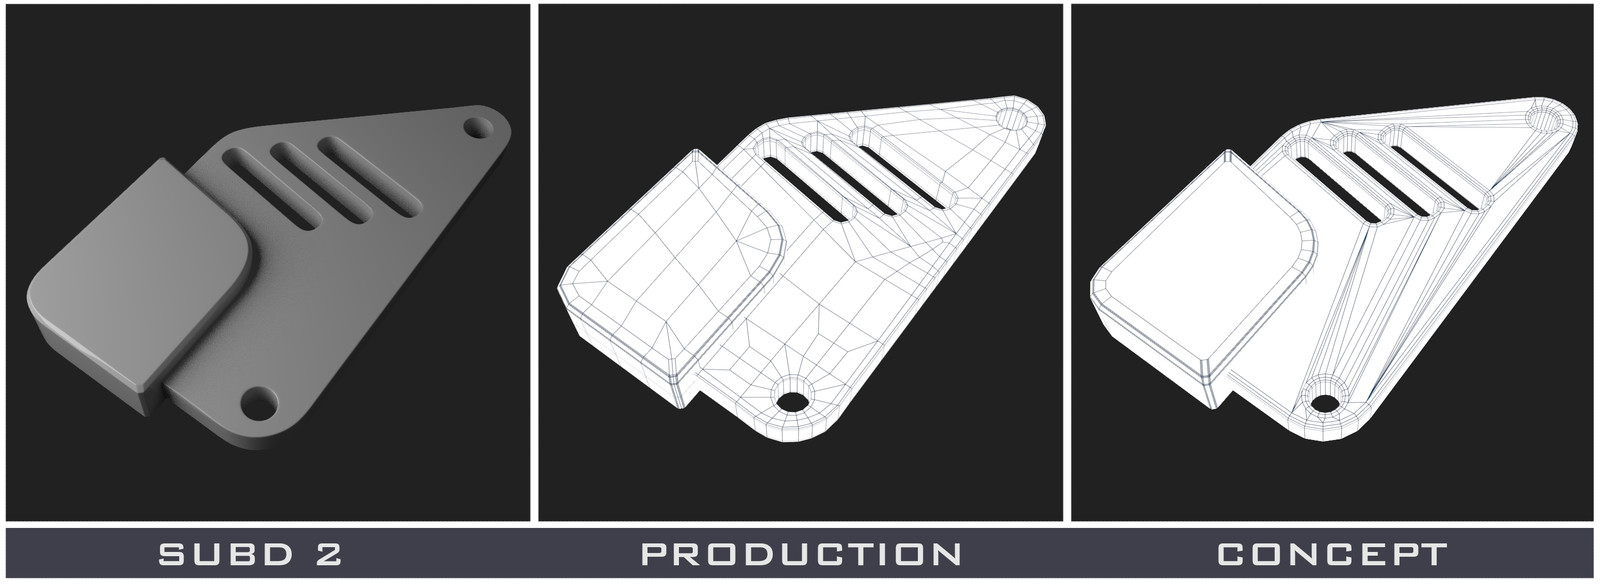
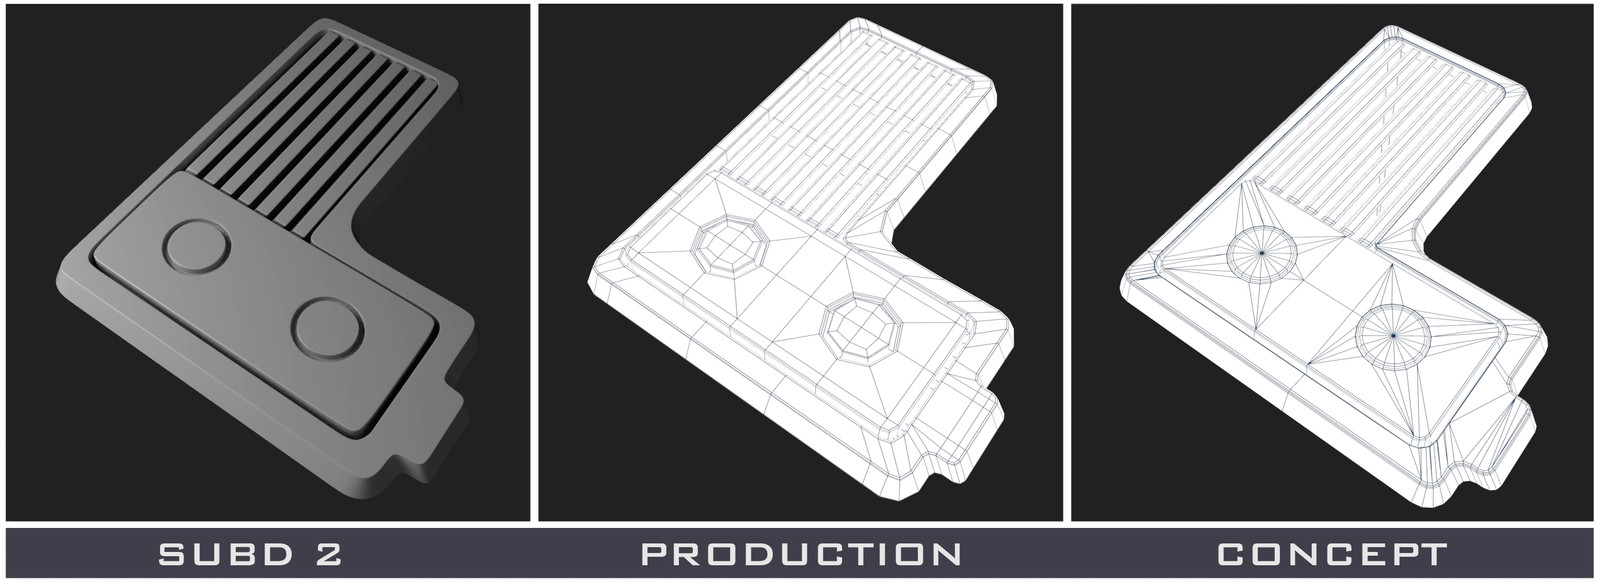
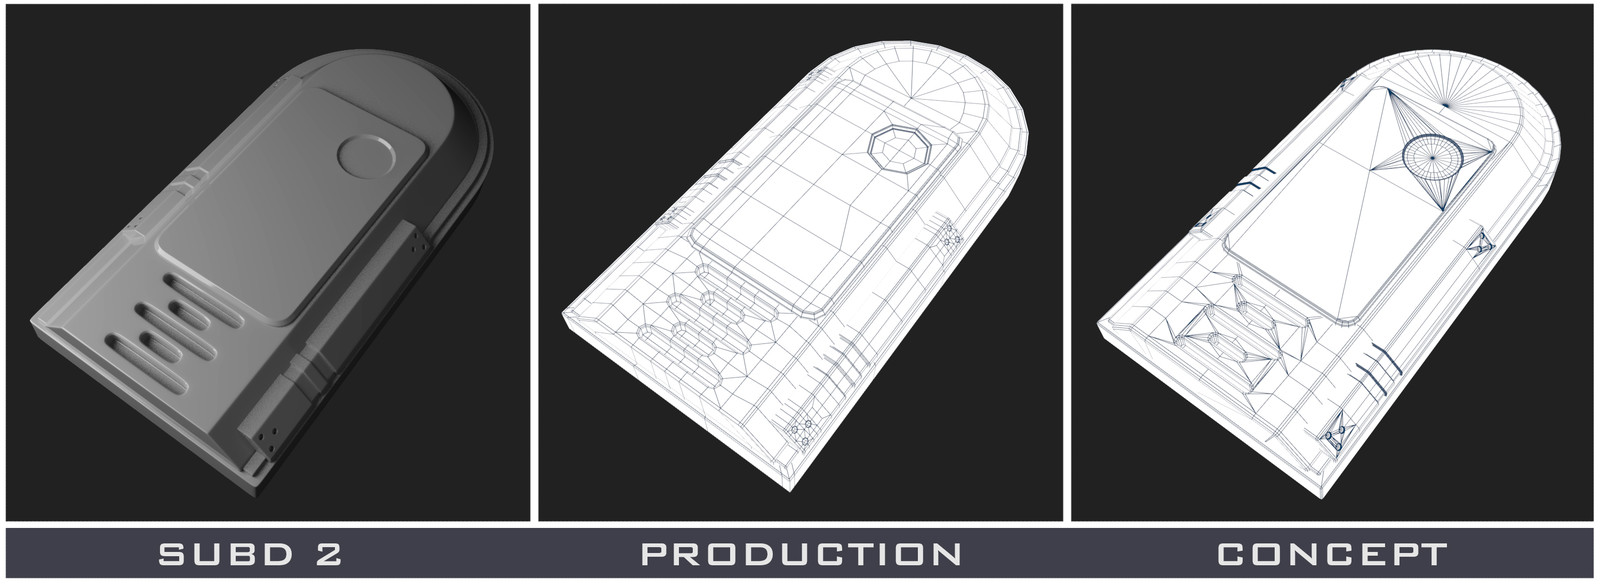
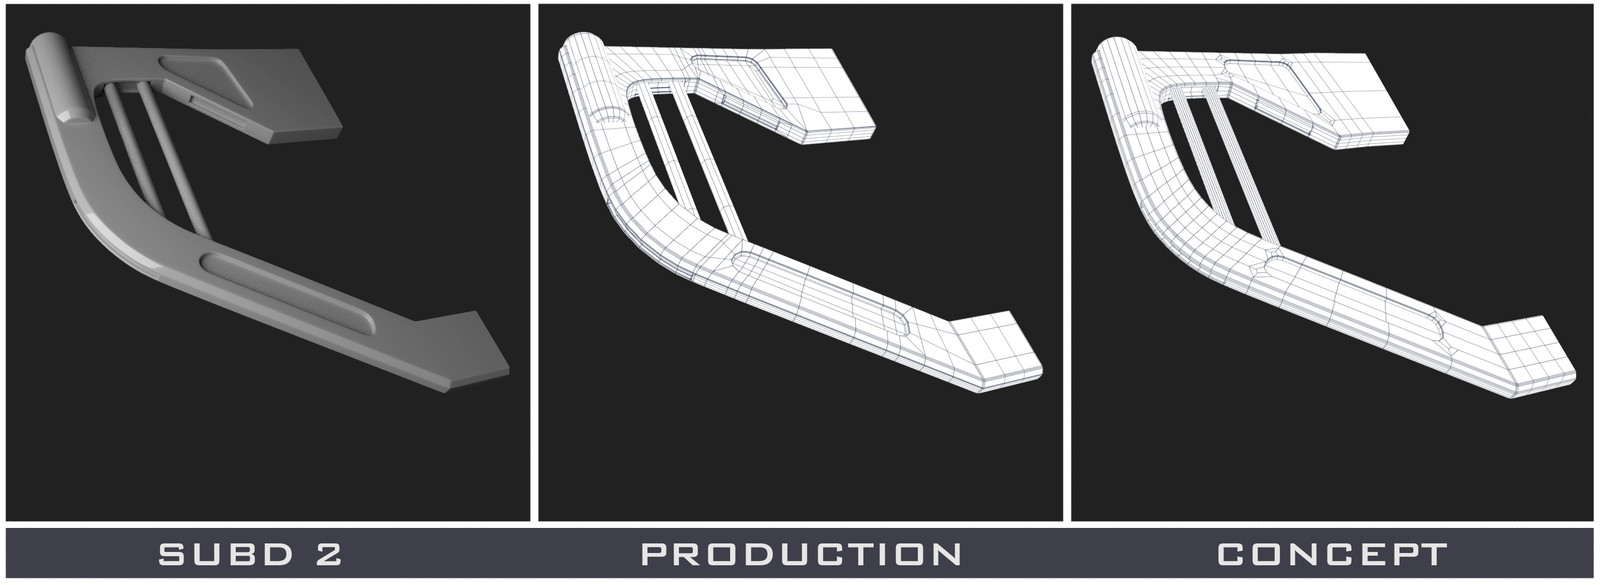
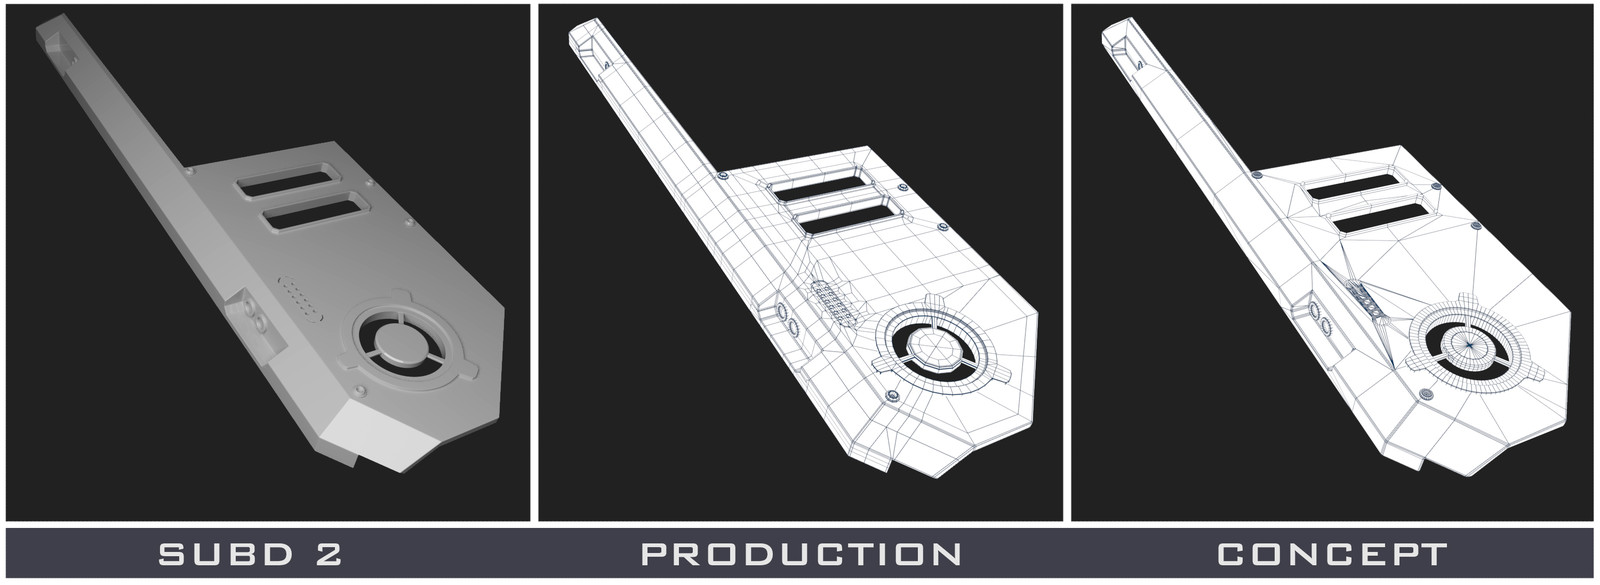
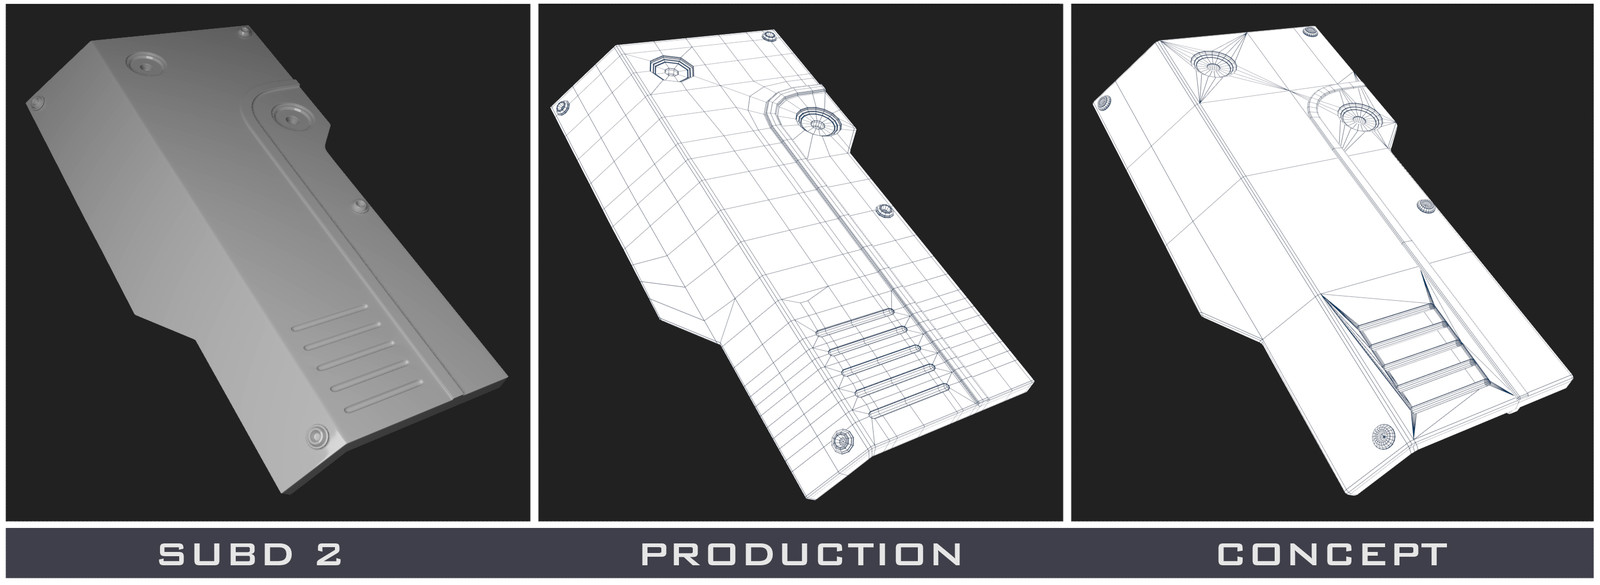
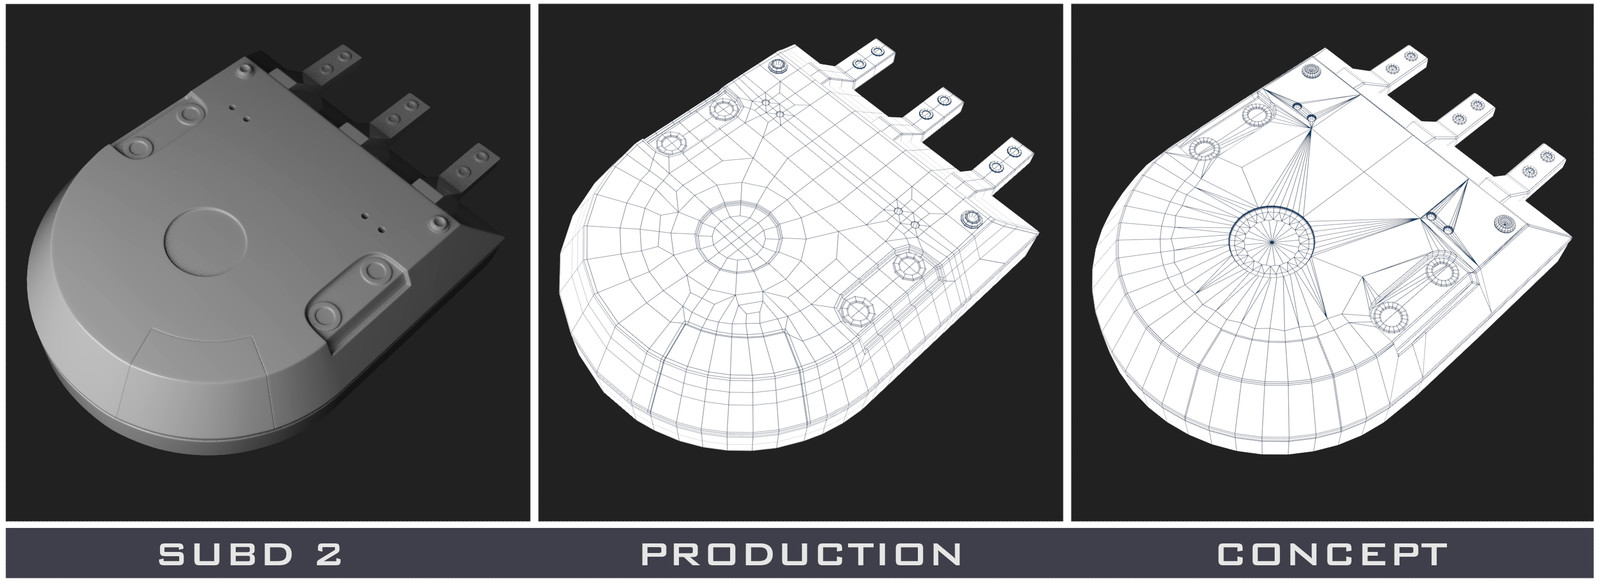
Examples (by Andrew Hodgson)
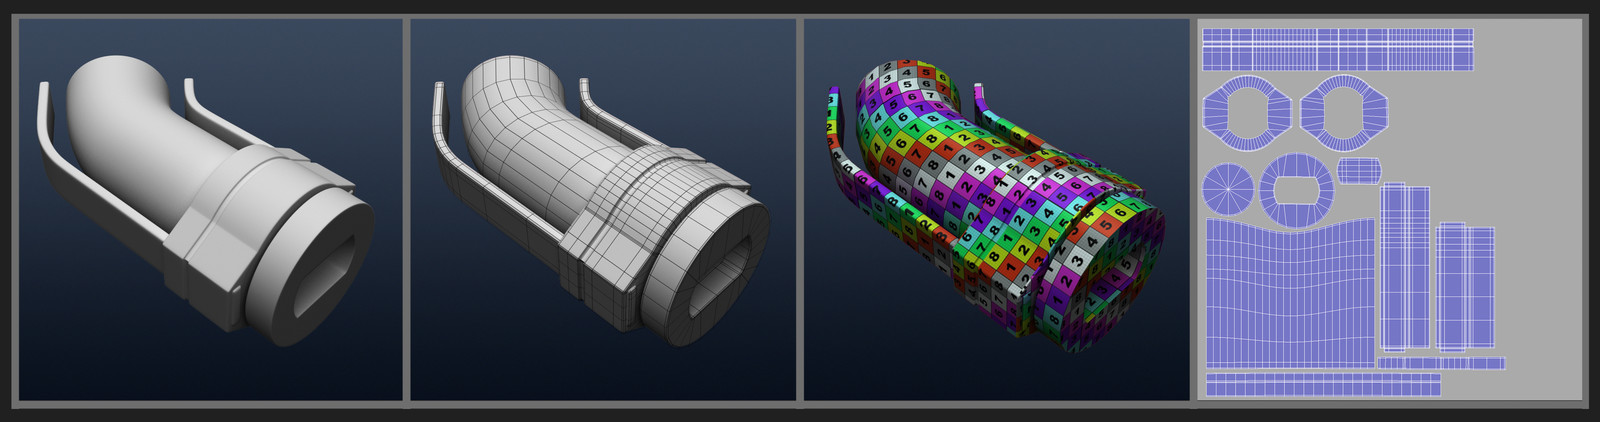
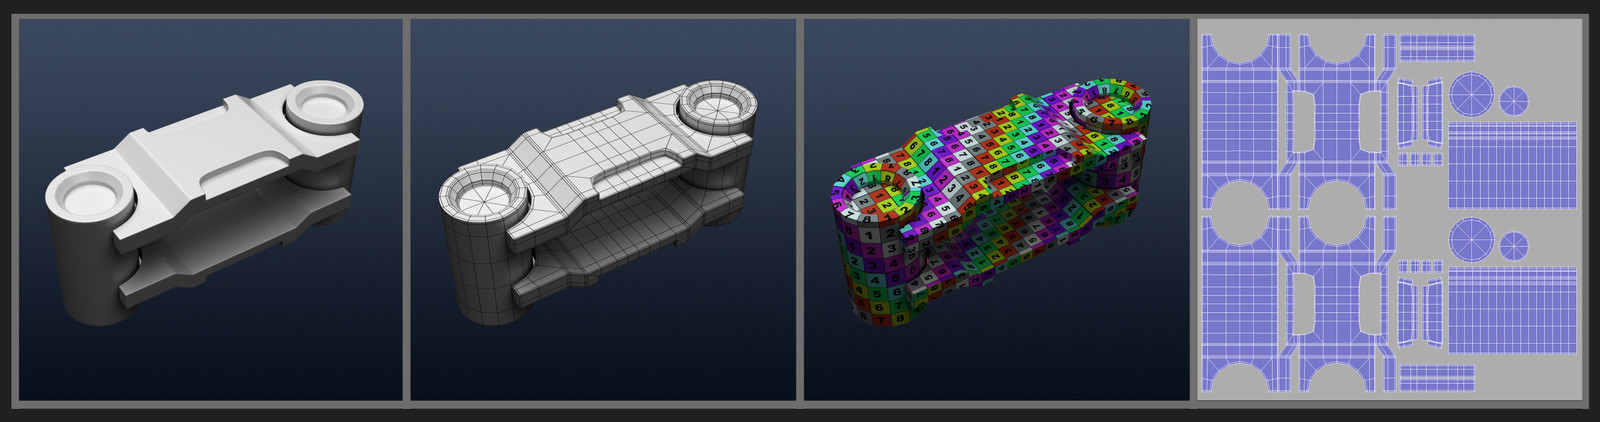
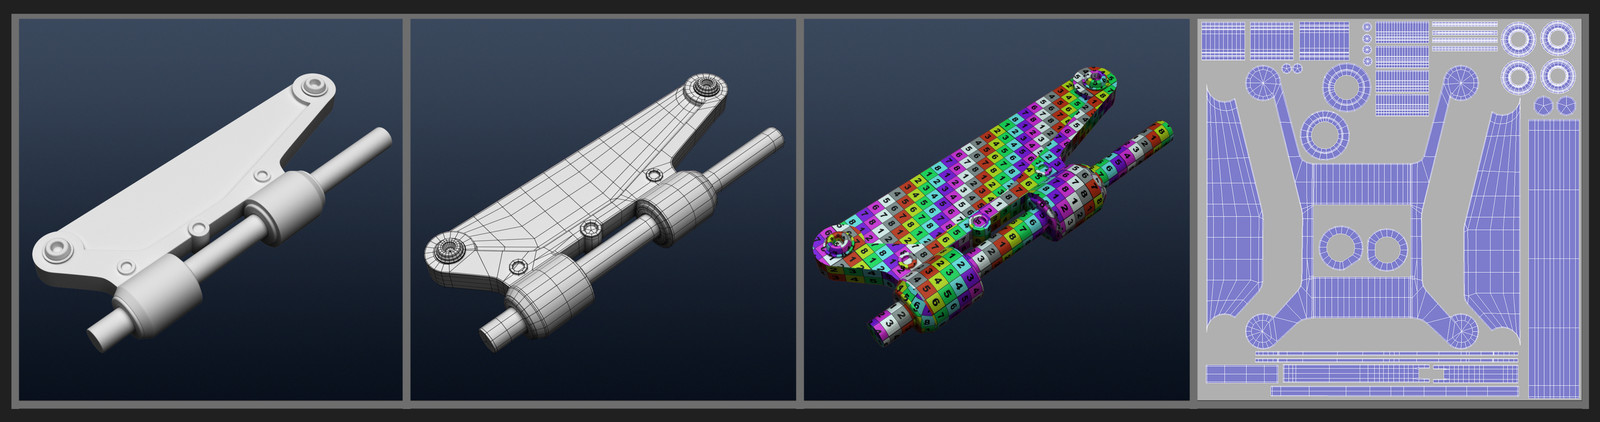
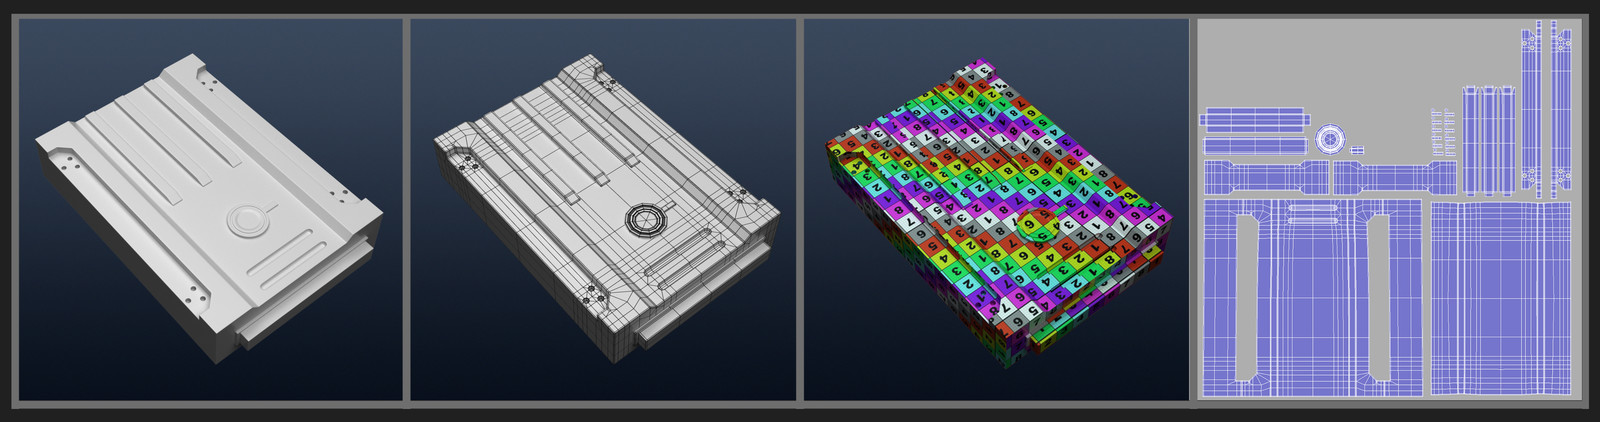
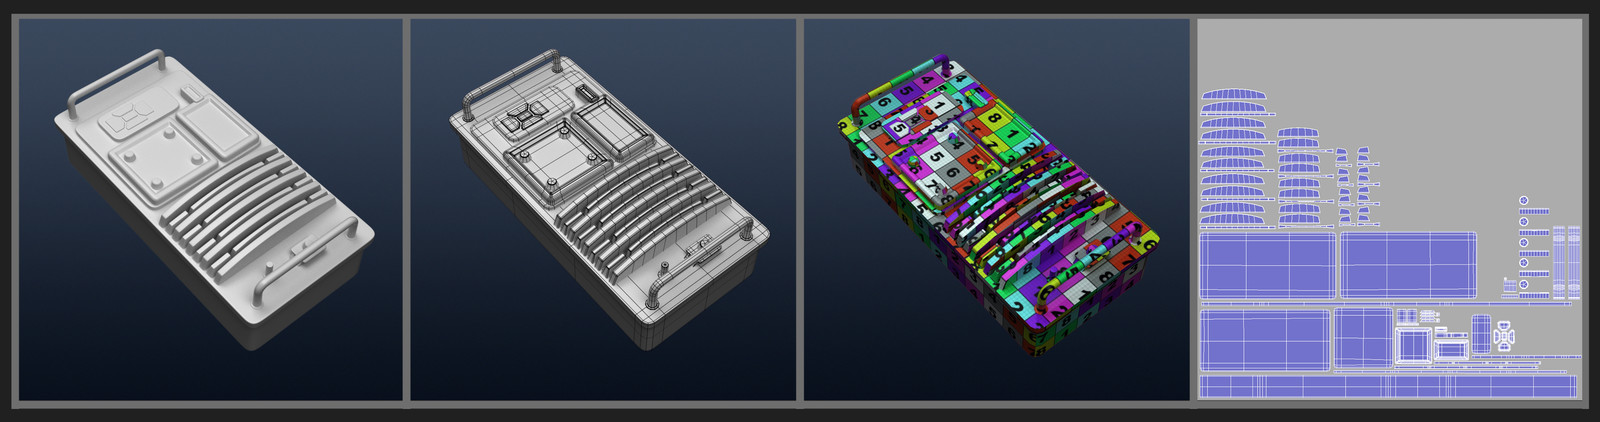
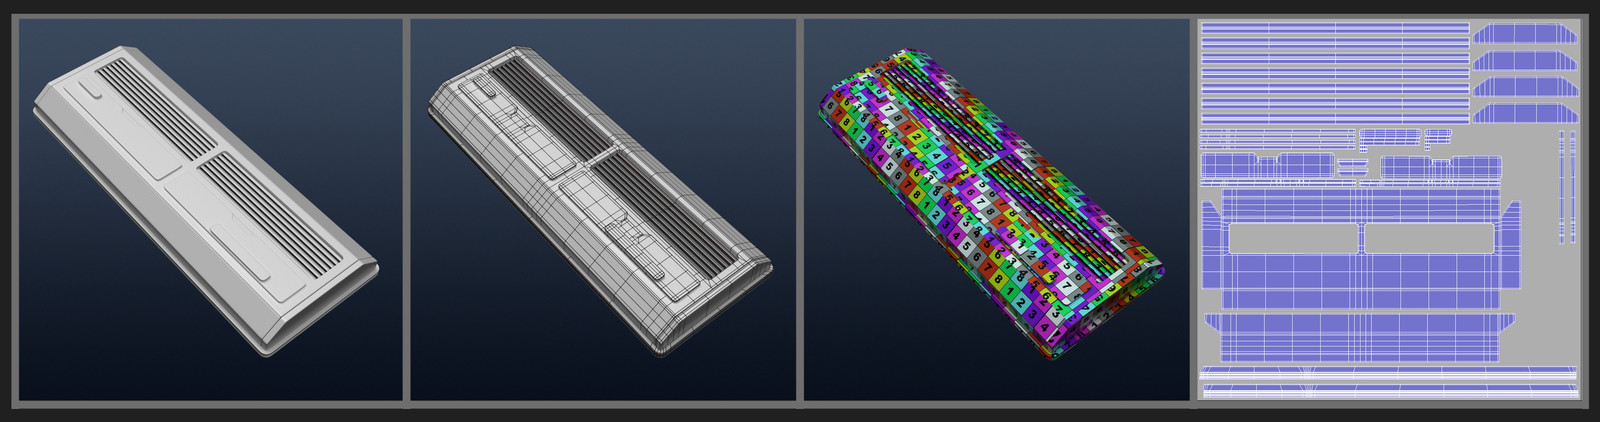
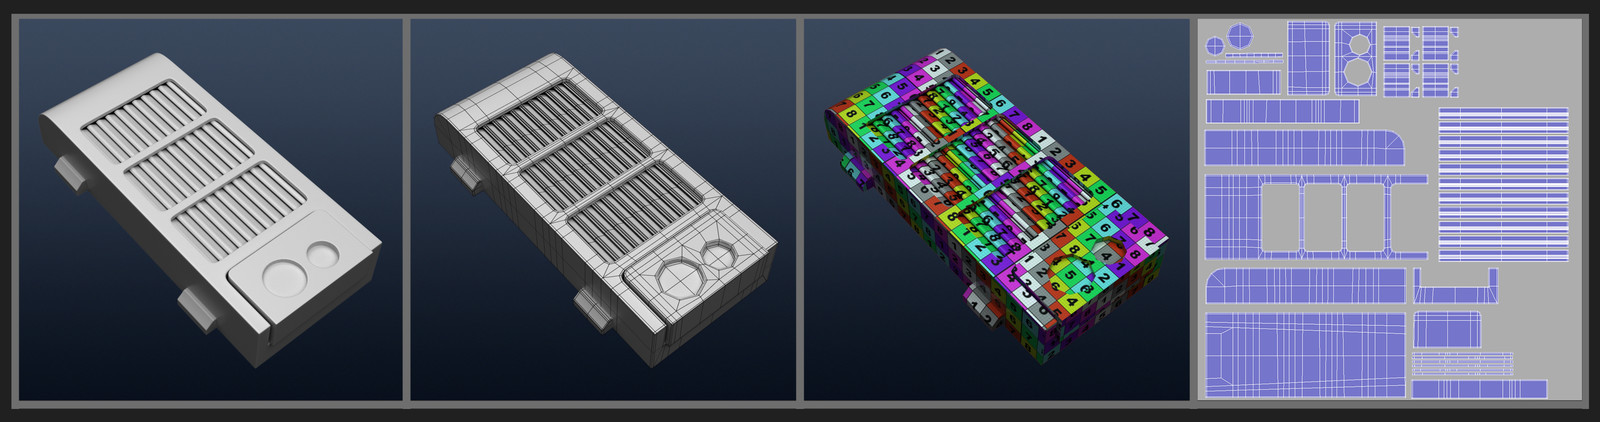
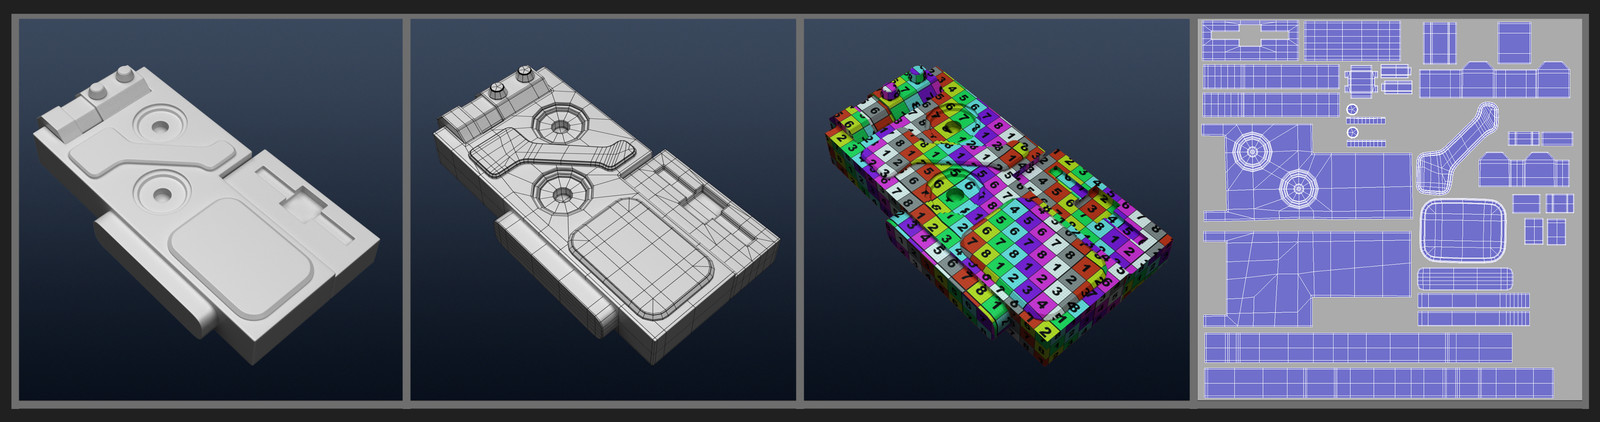
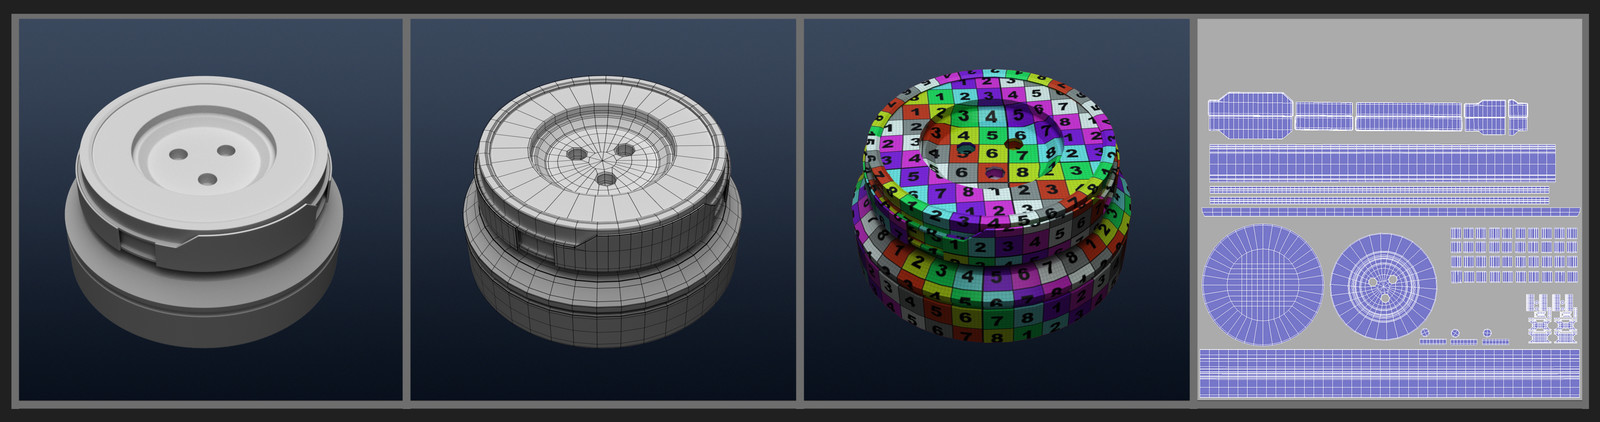
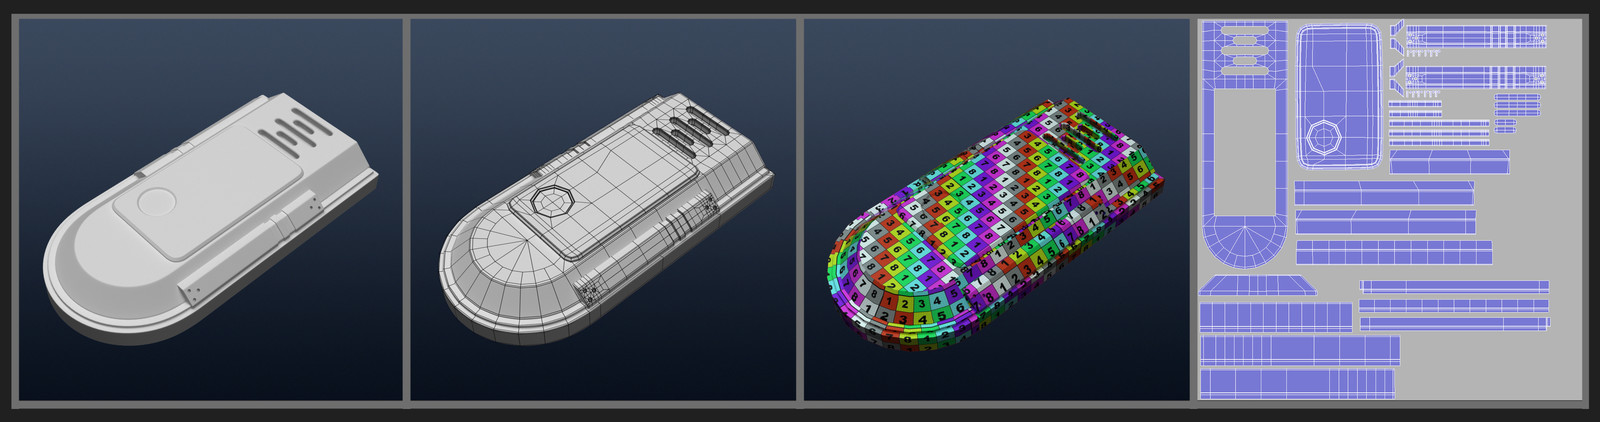

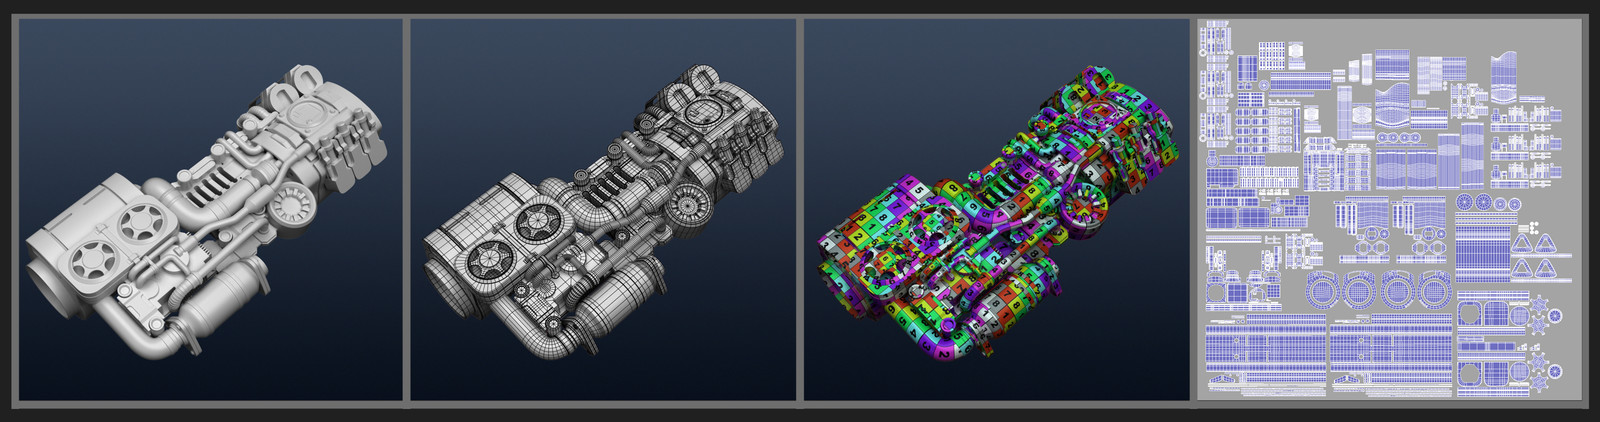
Production ready vs. concept topology (by Andrew Hodgson)
Poles
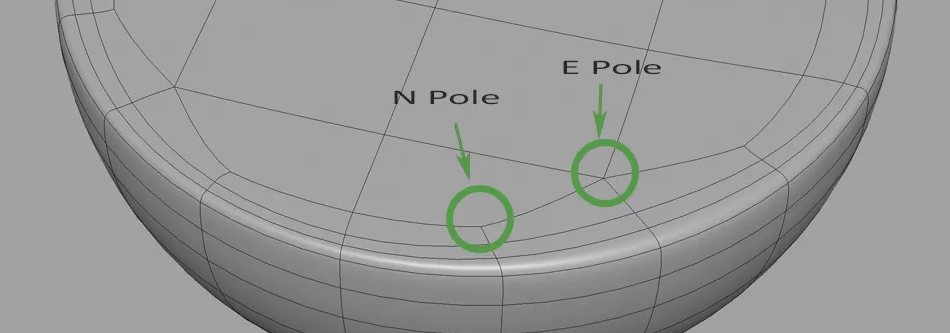
A pole, also referred to as stars, is a set of edges that merge into a single vertex. There are two types of poles: N-Poles (3 edges) and E-Poles (5+ edges).
Poles with 6 or more edges on curved surfaces will create problems when animating, as well as make shading look bad, especially when using SubDiv modifiers.
It’s not always possible to avoid poles, but one should strive to have as little poles as possible with the least amount of edges connection together and optimally place / relocate them to an area where they are less visible. 3/5 edge poles should appear sparingly and 6+ edge poles should ideally never appear, except for on flat surfaces that won’t experience any soft body deformations.
Where Do Poles Commonly Happen?
- (E-Pole) Extrusions
- (E-Pole) Using triangles and Ngons (it’s possible to integrate them without creating poles)
- (N-Pole) Inseting faces
- (N-Pole) Edges of objects (a cube for example has 8 N-Poles)
Blender’s selection tools make finding poles very easy. Simply select a vertex that isn’t a pole, then open the Select Similar menu (Shift + G) and select Amount of Connecting Edges. (If your software doesn’t support these selections tools, then one can add a SubDiv modifier and turn on modifier wireframe, which will make the E-Poles very apparent).
Placing & Relocating Poles
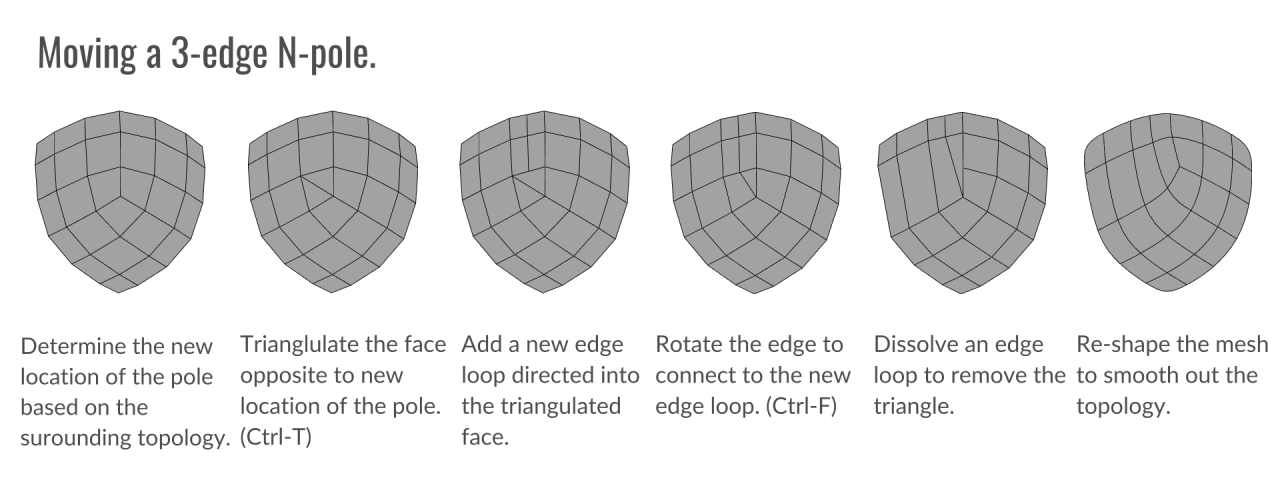
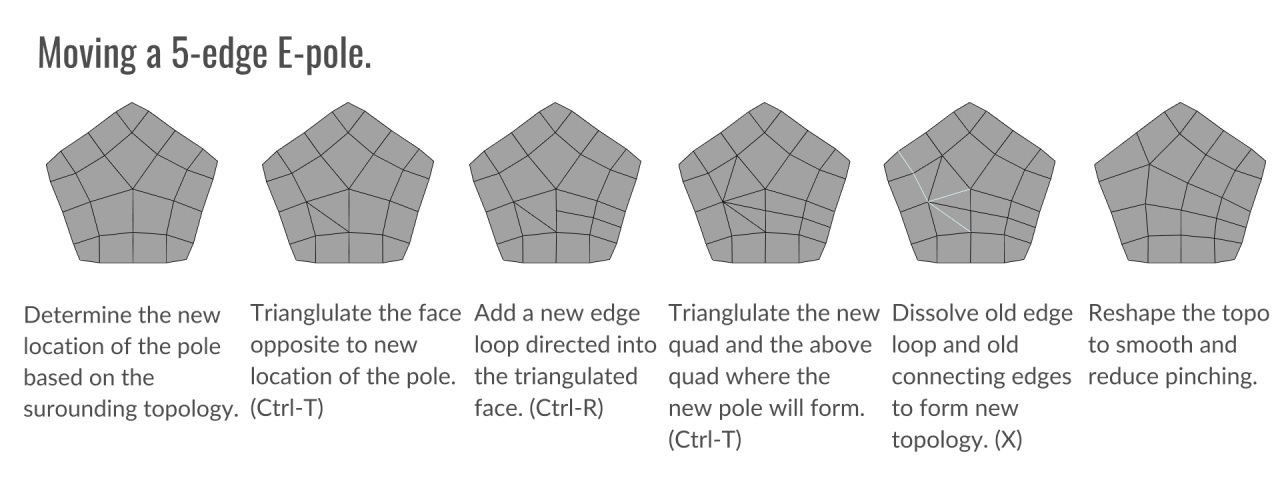
One can remove poles by redoing the topology in that area, however often poles are needed and can then be relocated.
Good spots for placing / relocating poles to, are hidden areas, like under the armpit, between the legs and so on. And as mentioned before, the surface should ideally not be very curved. It’s also important to move poles away from areas which will experience heavy deformation. Instead of dealing with poles when they’re a problem, it’s good to anticipate them and plan their locations. It’s relatively easy to judge where poles happen by looking at where the mayor topology flows intersect each other.
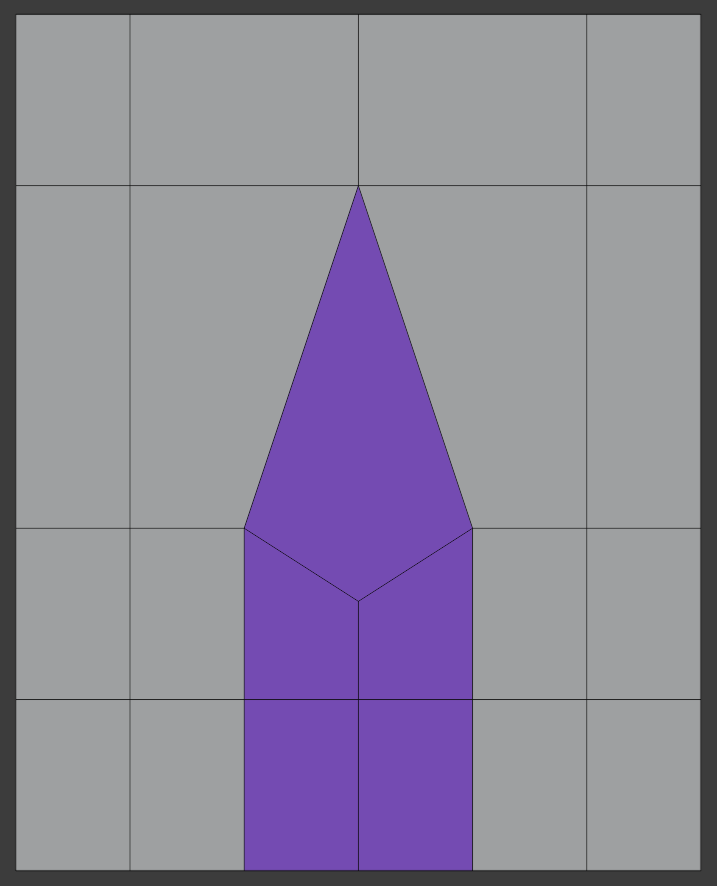
Here, the poles are completely sidestepped by inserting the face before extruding:
Relocating poles:
Terminating & Rerouting Edge Loops
Terminating edge loops is important when doing the final retopologized version of a mesh. There are 2 patterns to achieve this. These patterns can either be used to decrease or increase loops, as well as for rerouting loops.
The first pattern is:
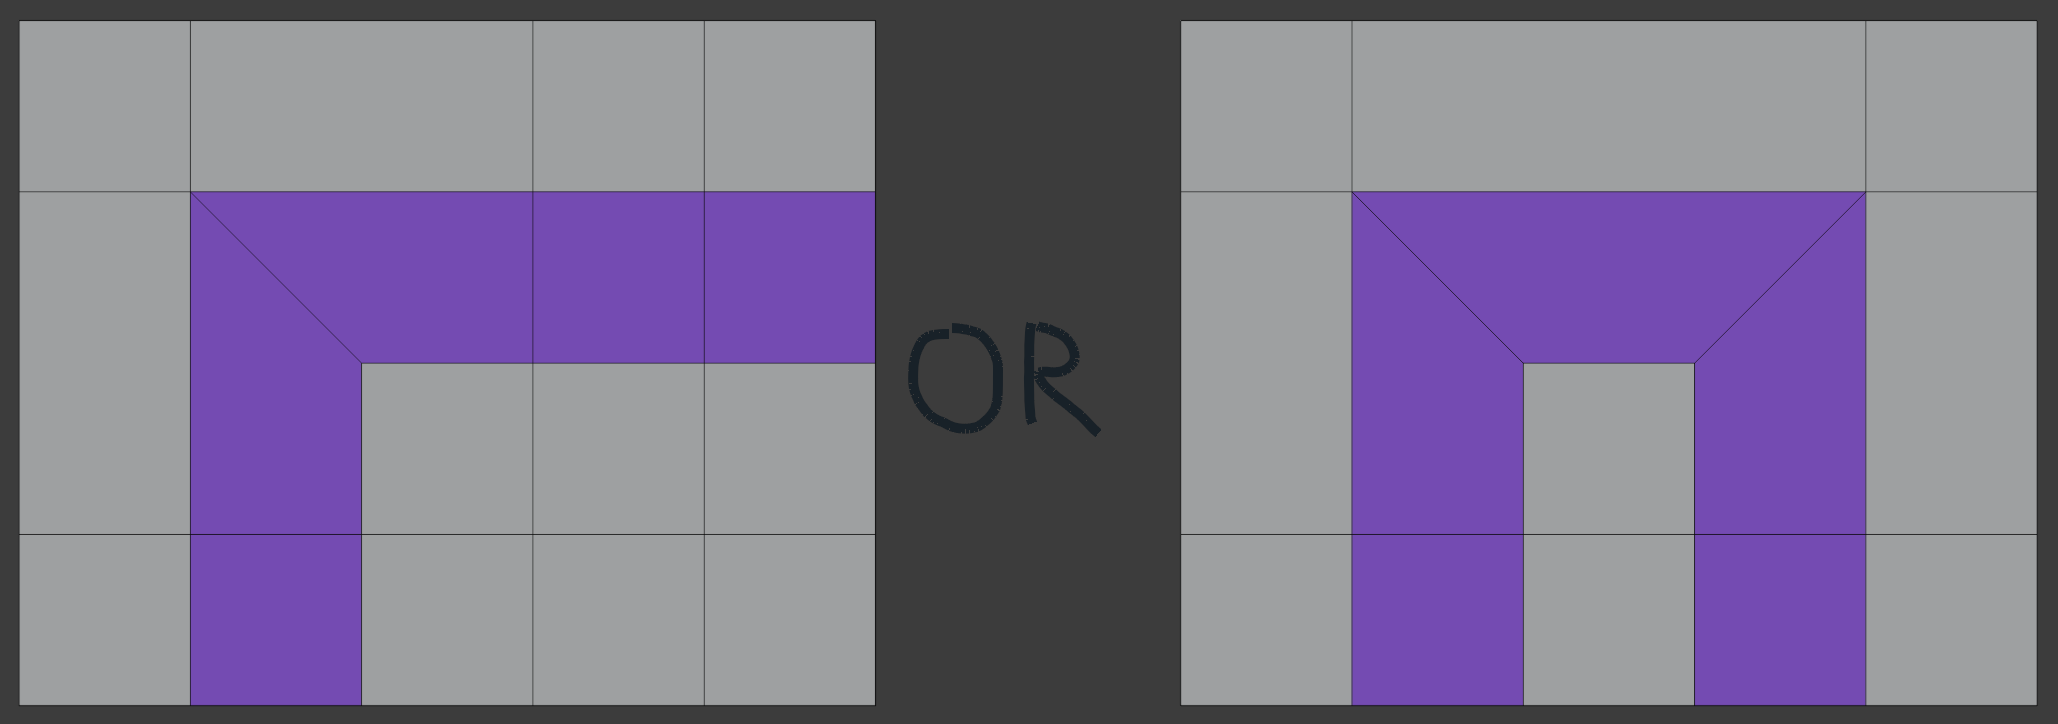
And the second pattern (diamond reroute):
Edge rerouting should be avoided on curved surfaces. Although rerouting patterns don’t play especially nice on highs with SubDivs, they can occasionally be useful in SubDiv control workflows.
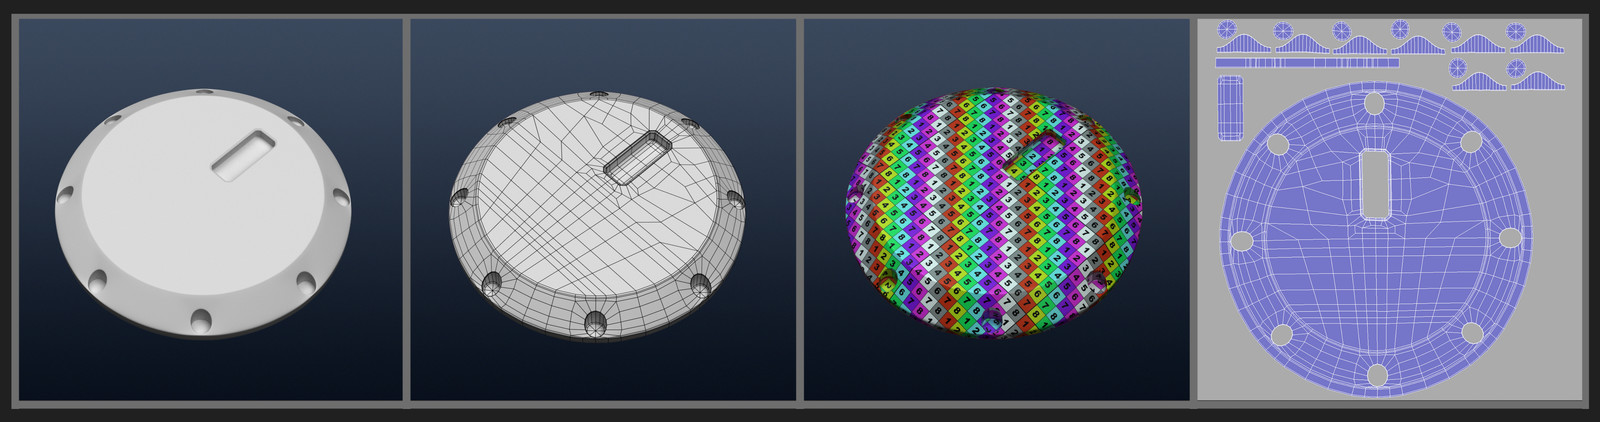
The Optimal Triangle & Quad Shape
- The most optimal triangle shape for a render engine, is a triangle with all of its sides having the same edge length, this is referred to as an equilateral triangle.
- The most optimal quad shape is a quad with all of its sides having the same edge length, this is referred to as a square quad
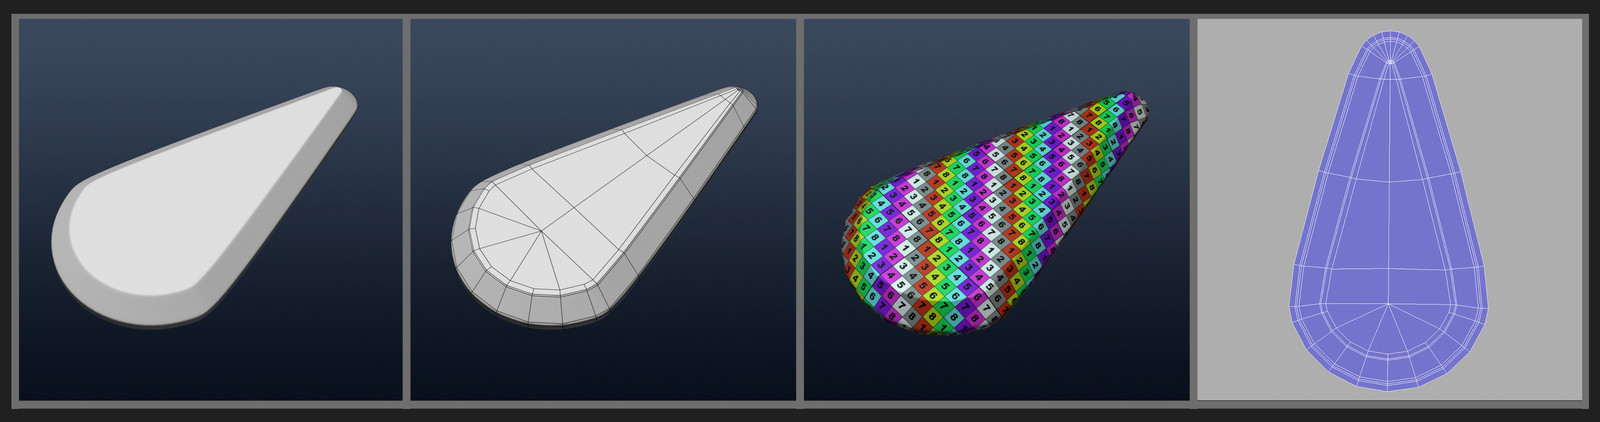
So with that in mind, in theory the cap topology on the right in picture 1 is better (it also has 2 fewer triangles). However, the difference doesn’t really matter that much, and the latter topology takes more time to make.
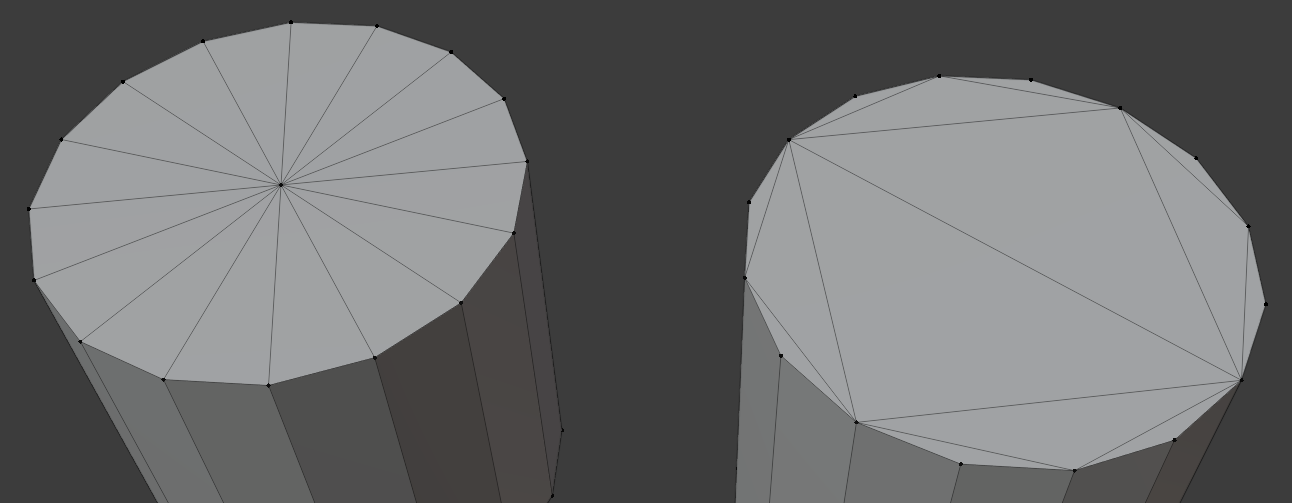 Picture 1
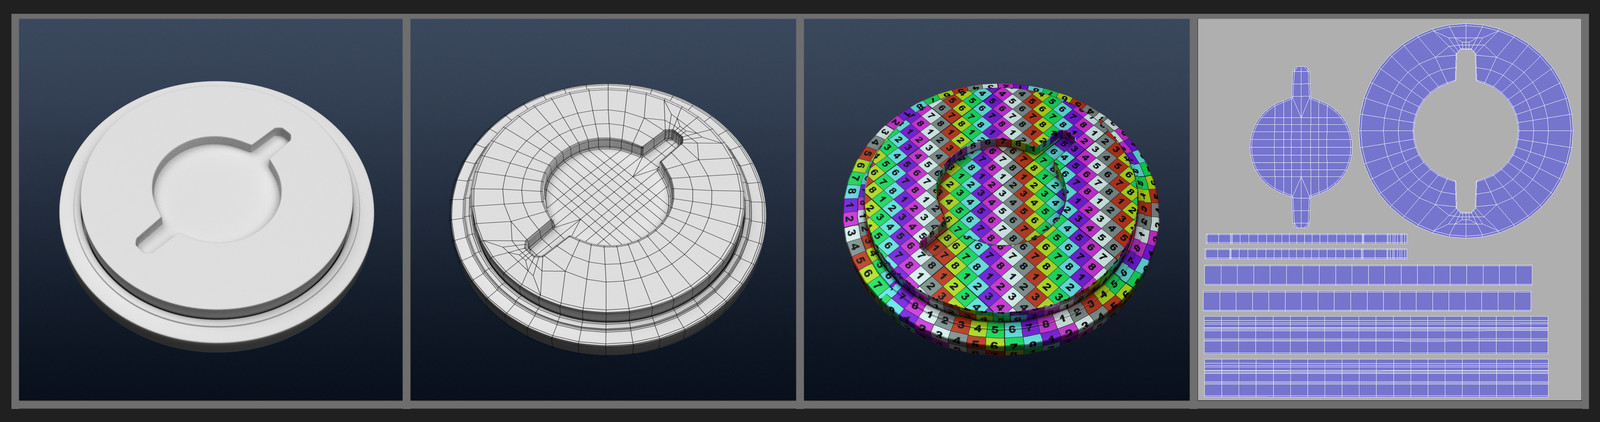
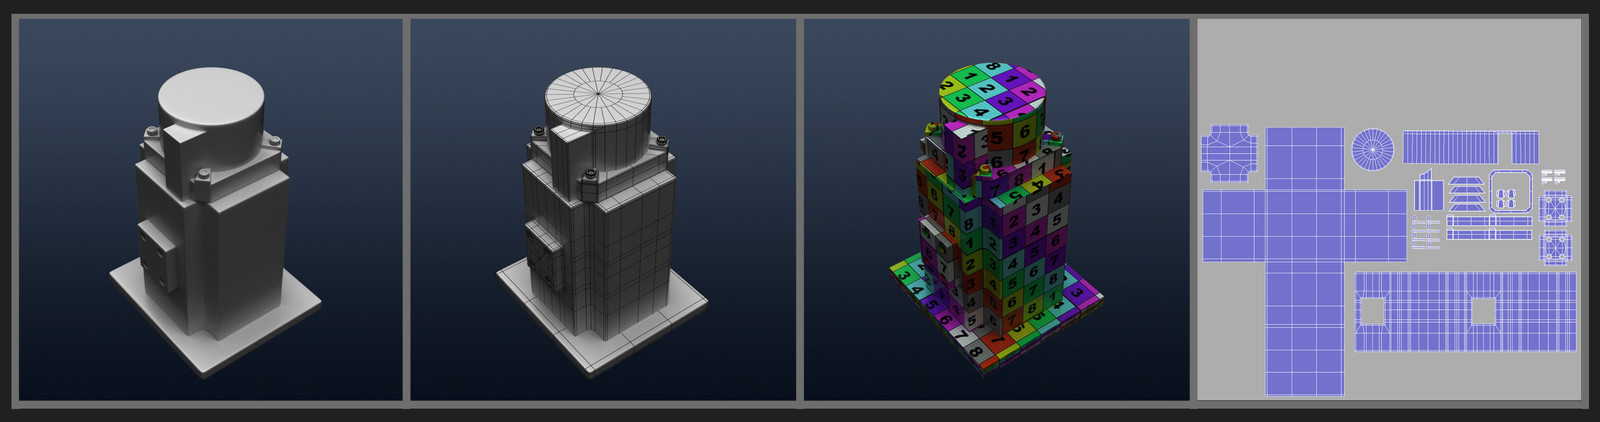
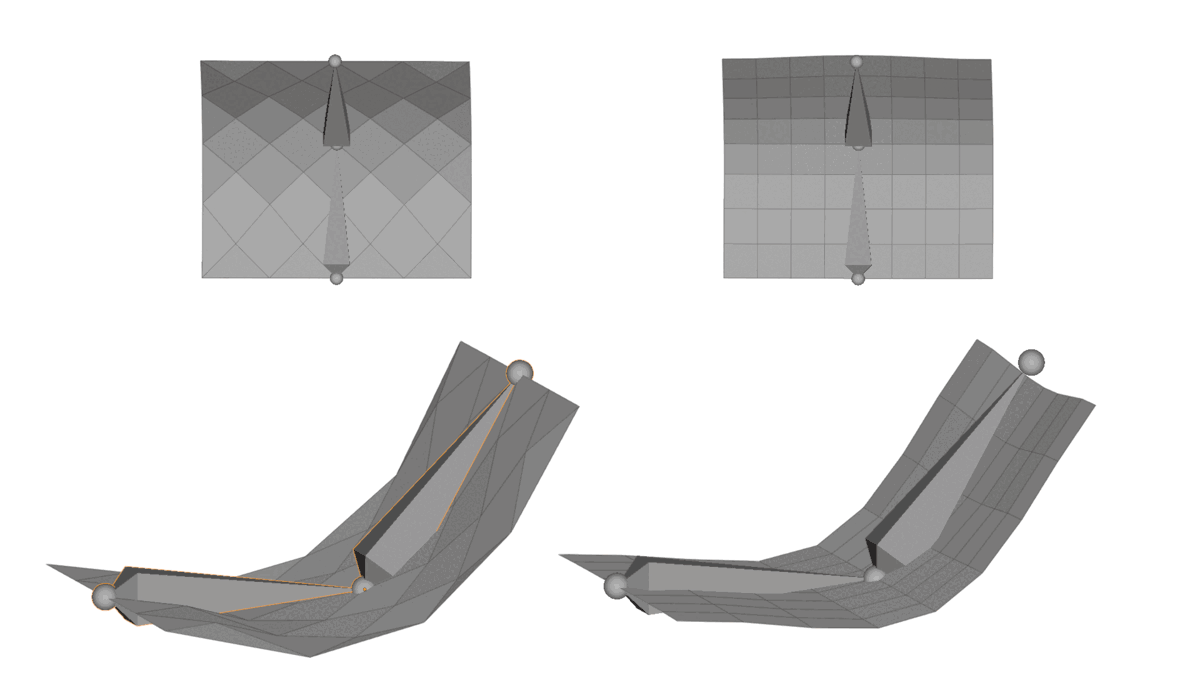
For the high cylinder, the most optimal cap would look something like picture 2 (Blender grid fill operation).
 Picture 2
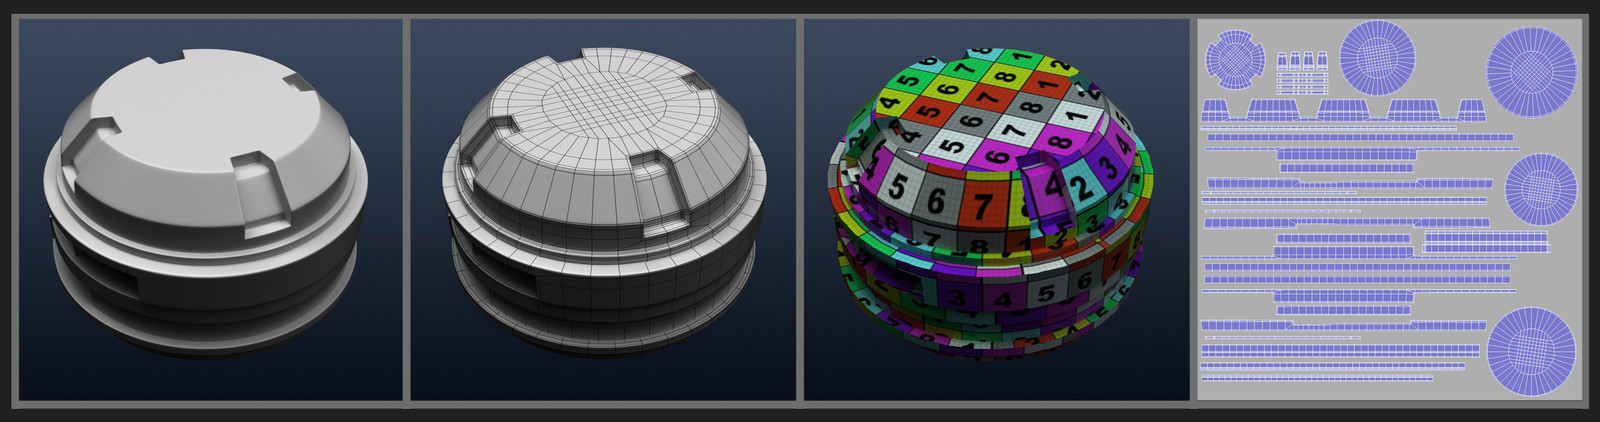
As one can nicely see in picture 3, the example from picture 2 has the best result with SubDiv and quite a good result with bevels. The left approach is the best with bevels, but the difference to the right one is negligible.
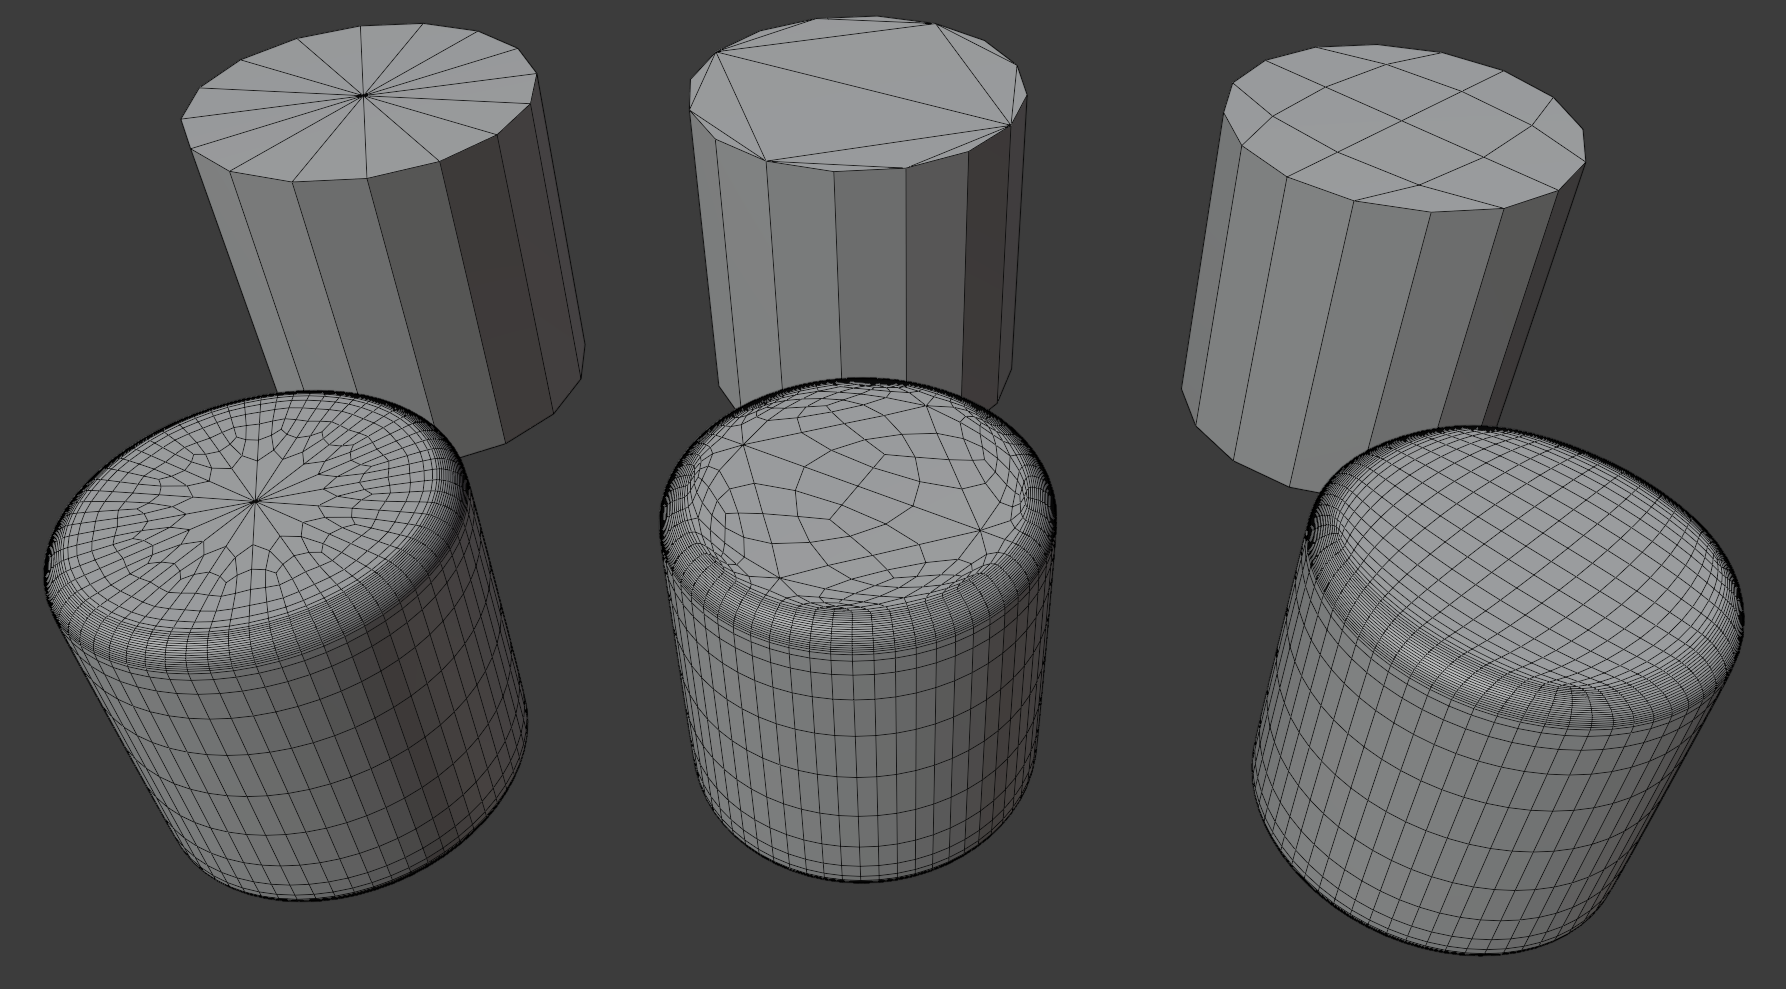 Picture 3
🚧Work in Progress🚧
- Avoid holding edges, go with creases and bevels
- Evenly space edge loops and try to keep every quad the same size
- Use extra edge loops in areas of heavy deformation. For example, transition areas and muscle joints
- denser topology around movement areas
- Add density in key areas and terminate the edge loop when it leaves that are to reduce polygons but still benefit from dense deformation areas
- Align edge loops with axis animation in mind, the axis of animation is mostly also the direction of the muscles. Though this is good practice, triangulation makes this much less important
Example:
- Tris aren’t always bad. It’s more that tris often bring poles with them which is undesired
Topology Methods
These methods are great for the low object, but one should be careful of using them for the high because SubDiv often doesn’t play well with topology that isn’t nicely quaded with 4 edge poles. And anyway this is to reduce topology count and that doesn’t really matter for the high.
Retopology
ZRemesher Retopo
Use ZRemesher during the creation process or for sculpts that are simply for training, but not for the final retopology pass for characters.
There are 2 methods of getting proper results with ZRemesher. Method 1 is to use the ZRemesherGuides tool and method 2 is to use polypaint.
ZRemesherGuides Method (Method1):
Polypaint Method (Method2):
- Polypaint the lines you want ZRemesh to follow (It’s good to turn off Tablet RGB Intensity)
PolyGroupIt from Paintwith PolyGroupIt Plugin in the ZPlugin tab (default plugin) 3.(optional) Tessimate SubTool for ZRemesh to go faster- ZRemesh with
KeepGroupson
To-Do
- Loops / Topology Of Characters
- Loops / Topology Of the Face
- Loops / Topology Of The Body
- Loops / Topology Of The Hands
- Loops / Topology Of The Feet
Links / Resources
https://www.youtube.com/watch?v=1DEx3iwFjbk https://www.youtube.com/watch?v=gLIKFCFxnIM https://www.youtube.com/watch?v=gKoNLMRR8iE