🚧Work in Progress🚧
Overview
There are many ways to approach skin textures and shaders.
- Hand painting skin in Substance Painter, ZBrush (Polypaint), Mari or 3D Coat
- Layer based with masking skin texturing in Substance Painter, Mari and Photoshop
- Procedural skin shaders in Blender, Substance Designer or Unreal
These methods can, of course, be combining as well.
Here’s a playlist of some good skin methods for a wide range of styles:
Texture Maps
Realistic Skin
Some of the methods employed for realistic skin texturing are:
- Projecting skin scans with the help of sites like https://texturing.xyz/ or https://www.3dscanstore.com/
- Sculpting pores and other skin damages in ZBrush using alphas
- Hand painting maps like subsurface scattering
- Procedurally generating freckles
Painting Skin
I tried to only use high-resolution images in here, so you should be able to simply pull the images you want from this website into your reference board.
Creating skin by hand without the help of pre-made materials and textures is great to know and allows for more creative freedom over the character.
Some good brushes: Dirt 1, Dirt 2, Cement 1
A look at the skin layers on a purely visual level.
| Group | Skin Layers | Color | Purpose / Properties | Thickness |
|---|---|---|---|---|
| Epidermal | Stratum Corneum | Translucent, White | dead cells, color pigment cells, water | 0.02 mm |
| Epidermal | Epidermis | Skin Color (from melanin) | 0.04 - 0.13 mm | |
| Subdermal | Dermis | Pink, Red | blood vessels, hair follicles | 1.1 mm |
| Subdermal | Hypodermis/ Subcutaneous | Yellow | fatty tissue, blood vessels | 1.2 mm |
| Subdermal | Muscle | Pinkish-red, Reddish-brown | 2 - 5 mm | |
| Subdermal | Bone | White, Yellow | The Humerus (upper arm) is about 20 - 30 mm | |
| https://gurneyjourney.blogspot.com/2008/05/color-zones-of-face.html |
Now, together with the understanding of the layers and the color zones of the face, you’re ready to do some face painting.
The goal is to incorporate the color zones of the face on the subdermal layer and then paint the skin on top of it, in such a way that one can still slightly see the subdermal layers beneath.
To start things off, create a couple of subdermal colors.
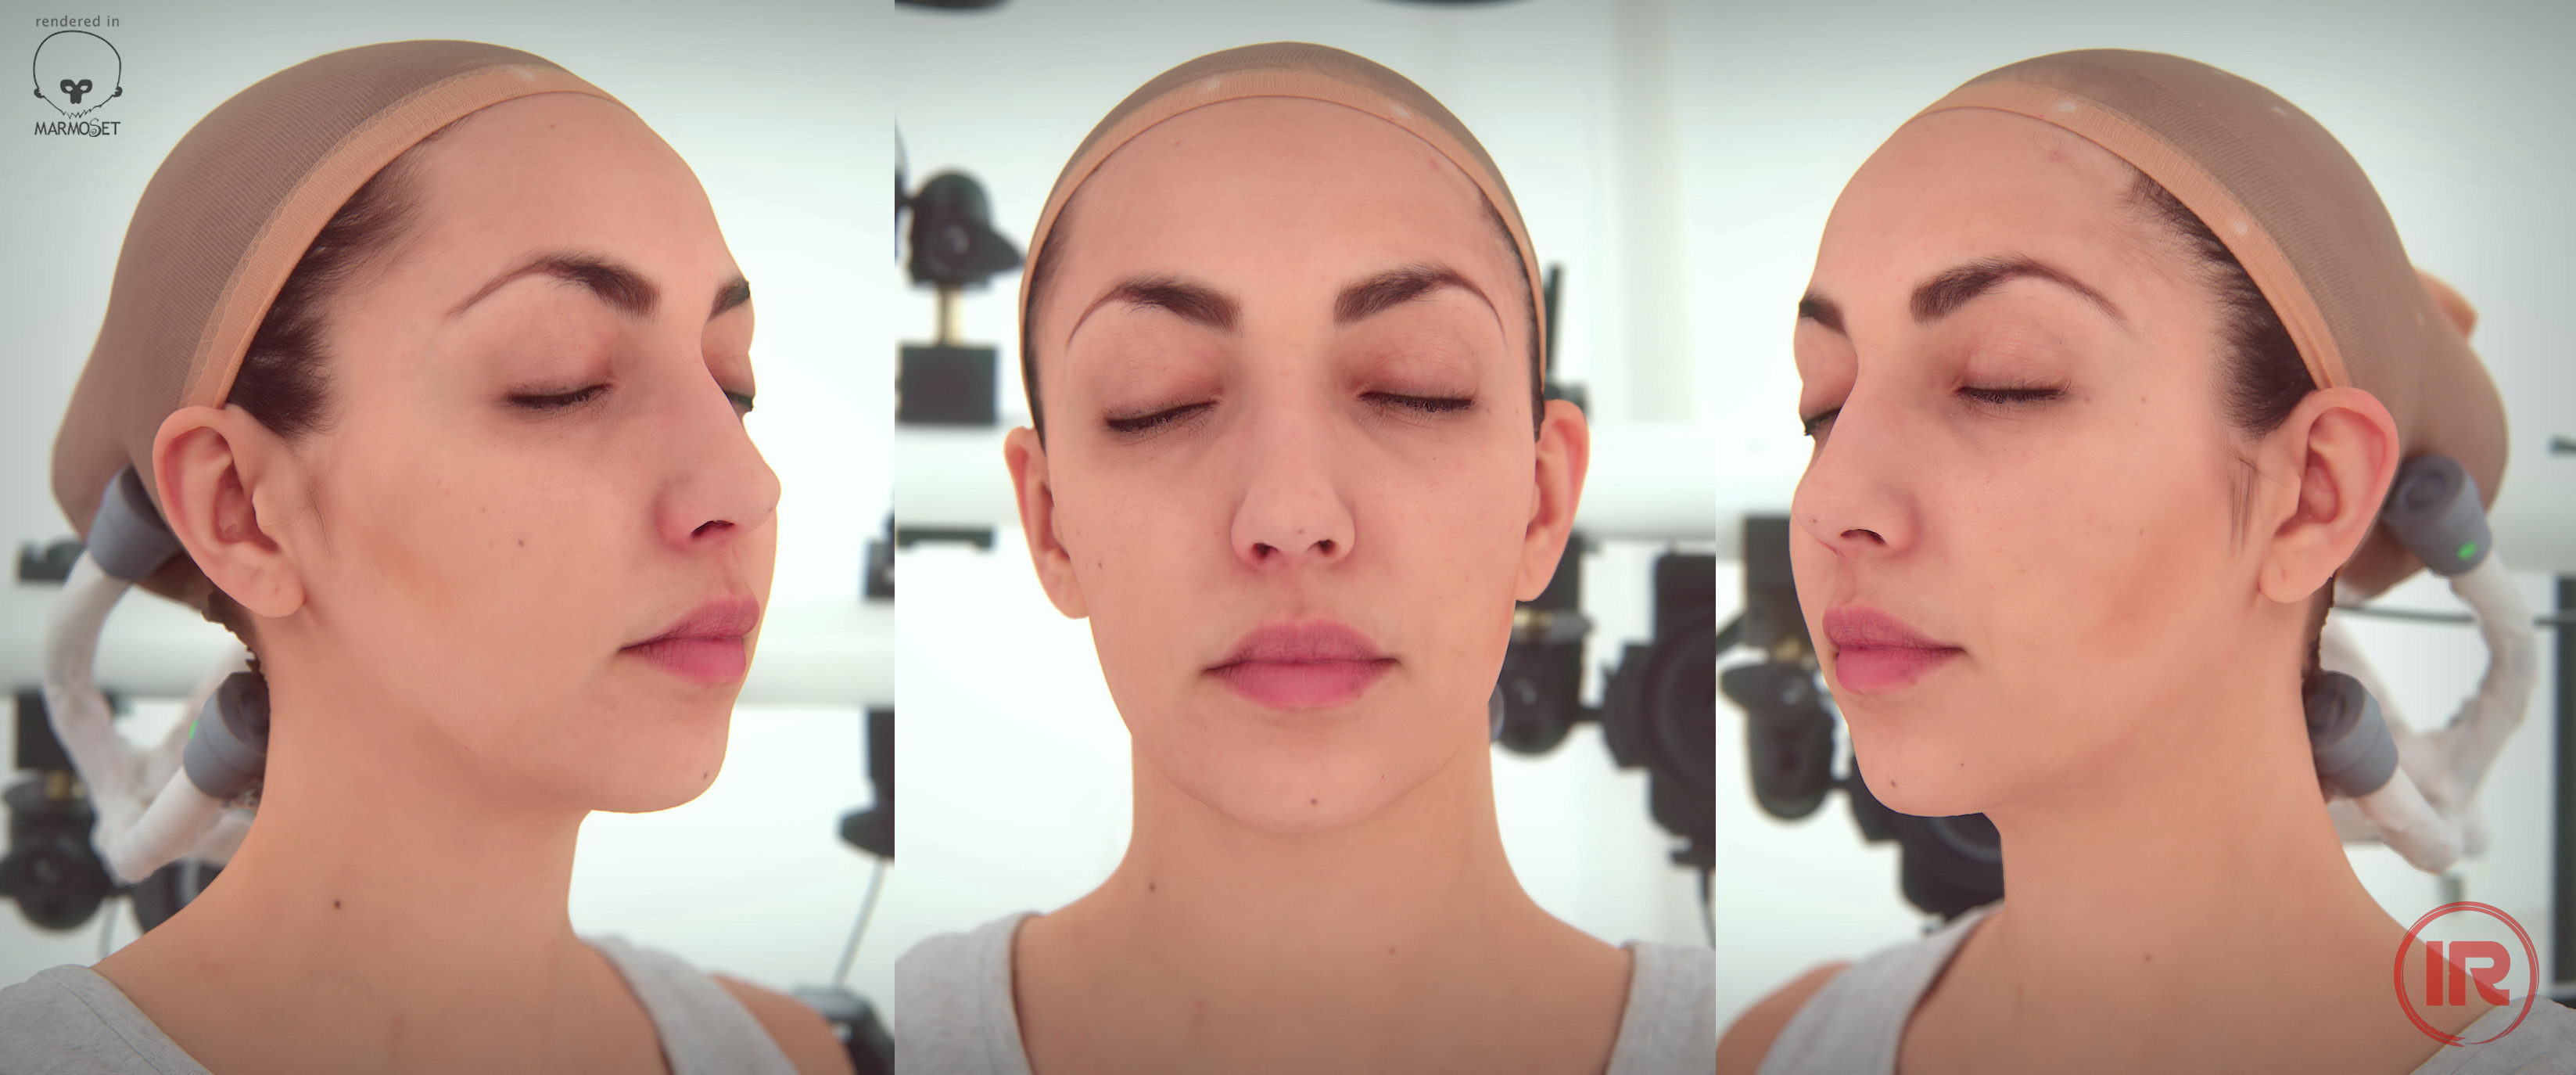
Cross polarized photographs (photographs that remove reflected light, so it’s like a base color channel image)

Red (Blood, Arteries) I like starting with red as the first layer. Use a dark blood, like red. If you’re using fill layers with mask painting, then don’t overthink the values too much and tweak them later on. (Starting with red will also directly give your mouth cavity the correct color)
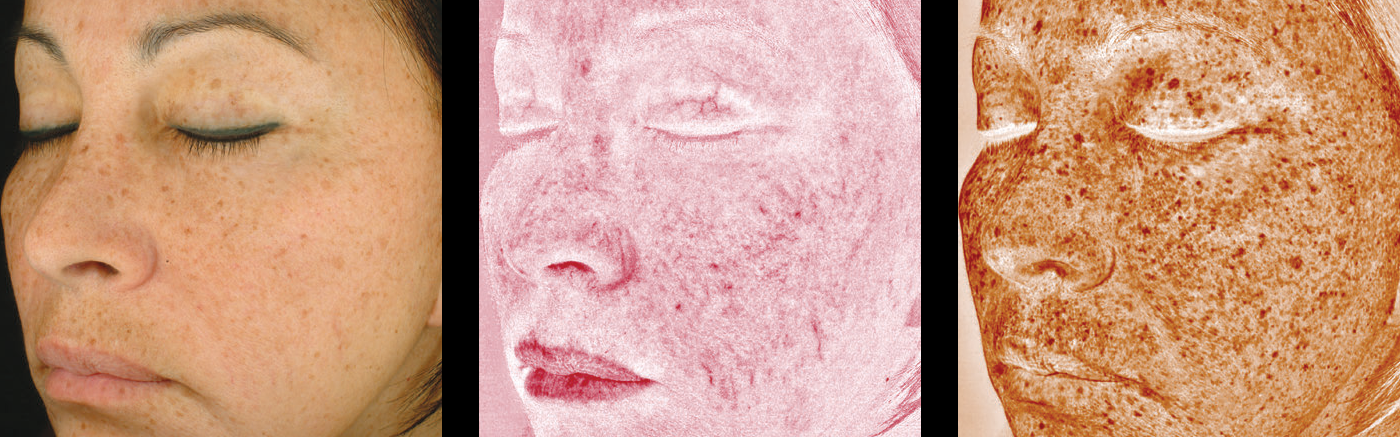
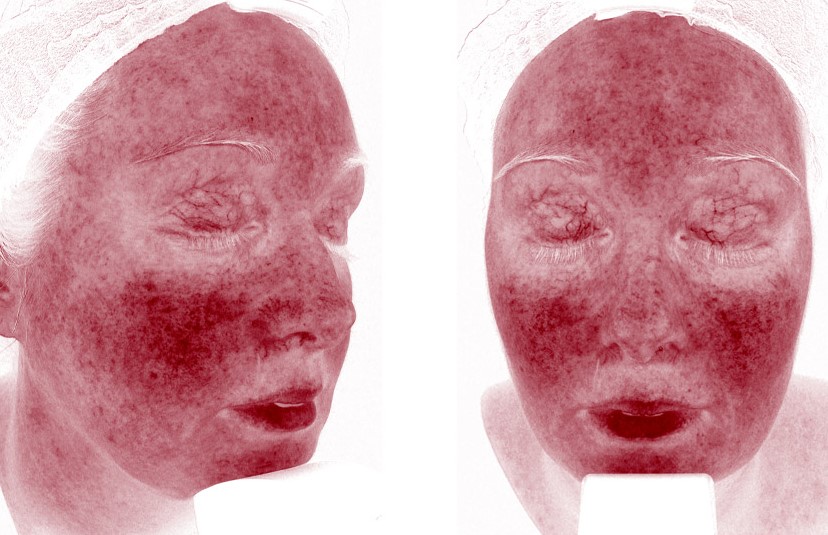 Circulatory system revealed with RBX cameras.
Yellow & White (Bone) Next comes the yellow layer, even though logically, it would make more sense to have it beneath the red layer, in practice having it above is better as the bones are quite close to the surface in areas like the forehead and around the eyes. Further areas are the nose bridge, the chin, a bit of the jawline and the earlobes.
Color wise, it’s better to stick with yellow as bones tend to look more like that under the skin, but depending on the artistic look one is going for, one could make it more white for all areas under the forehead. (Follygon for example, likes using white more, as he shows here.)
Blue & Purple (Veins, Under-oxygenated Blood) Now come the blues and purples. Depending on the character’s gender, these regions will be quite different. For males, it’ll be the entire lower jaw, while for females it’ll be limited to around the mouth. In addition, both genders will have it under the eyes.
Use purple very lightly and sparingly to exaggerate it further in areas like the center of the lips and maybe a little blob under the eyes.
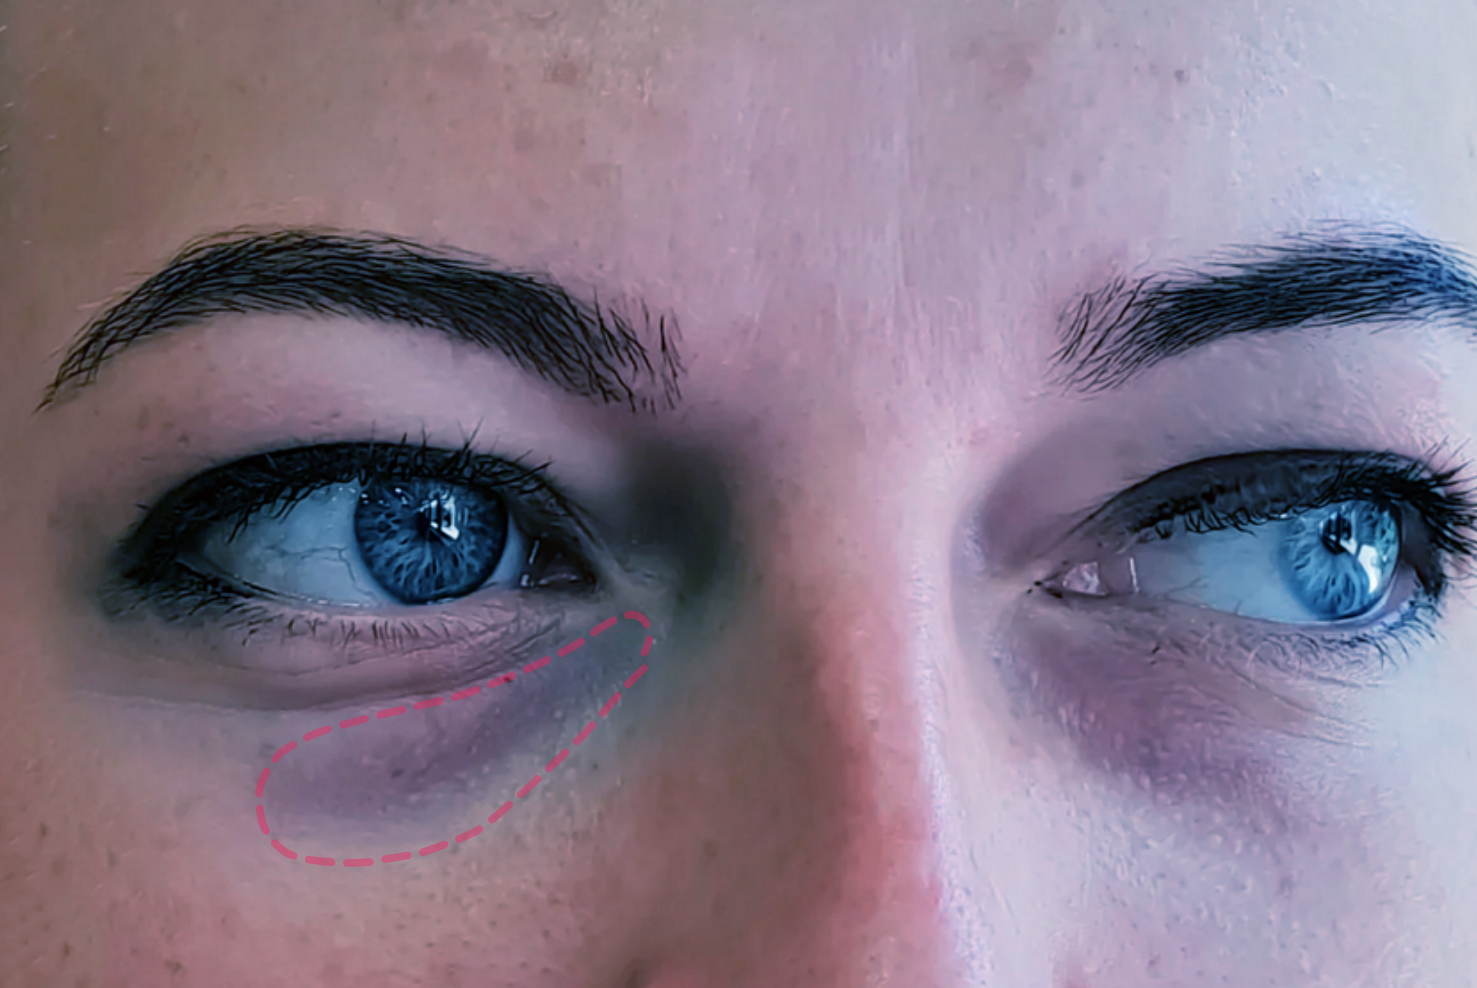 Note that this person has it very prominently, and I adjusted the values of the image to reduce the reds and further bring out the blues!
- The Subdermal color are just base color and all of those colors will re-appear in the Epidermal layers
- Occasionally turn of symmetry and do some painting without it, but don’t forget to turn it back on
- paint detail